The Definitive Kitchen Guide 2019
The Definitive Kitchen Guide 2019; A biblical guide on kitchen design and renovation!
Everything from DIY to immaculate self-centered design choices, we’ve got you covered.
Check out our round-ups on all the “HOW-TOs” to your kitchen curiosities.
The Compulsary Kitchen Guides:
- How To Choose The Best Stone For Your Kitchen
- How To Get The Right Walls For Your Kitchen & Home
- How To Arrange Your Kitchen Neatly
- How To Keep Your Kitchen Clutter Free
- How To Always Have A Clean Kitchen
- How To Make Your Kitchen Child-Friendly
- How To Install An Undermount Sink
- How To Install A Flushmount Sink
The Extras For Every Homeowner:
- How To Set Up A Kitchen For Dummies
- How To Pick The Right Kitchen Theme
- How To Clean Your Kitchen Counter In Singapore
- How To Choose Your Kitchen Top Edge Profiles
- How To Pick The Right Countertop Material
How To Choose The Best Stone For Your Kitchen
Which natural stone is actually the best option for the kitchen countertop? Check out this to know 8 Pros and Cons of materials used in making the countertop.
Choosing installations for your kitchen that could give rise to a contemporary aura has always been a challenge. In fact, the most significant elements in the kitchen are the ones easily neglected.
Back in the days, the kitchen was always designed to be a confined and isolated space.
Today, people want a spacious and comfortable kitchen not only for cooking, but to allow a better flow in spatial change between the rooms of the house.
Contemporary kitchens are the trend to follow and it is what the world is looking at right now.
A minimalist layout with the simplicity of the color choices for the room defines a contemporary room.
But to create a functional and modern kitchen is not as easy as it sound. Here are a few essential elements to emphasize while designing your desired contemporary kitchen.
Countertops
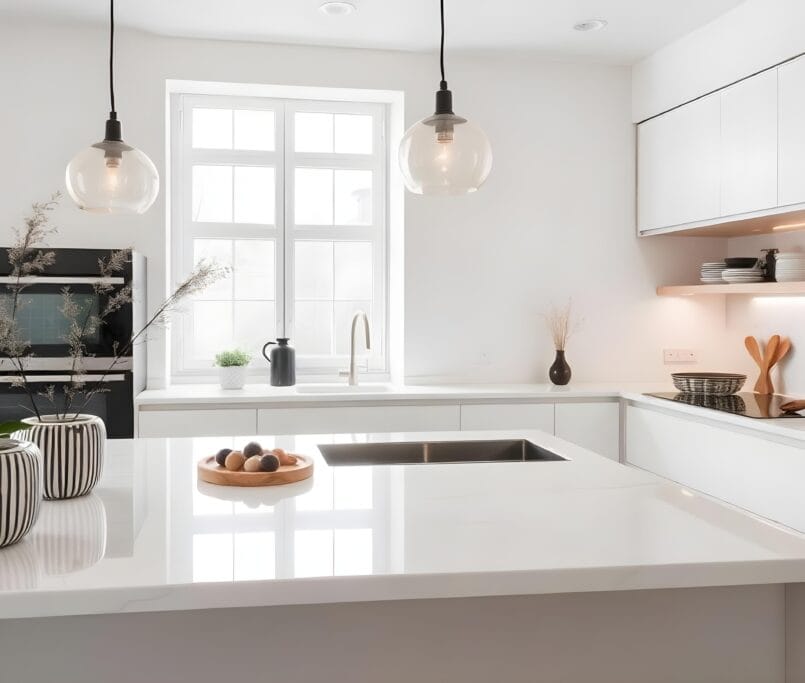
Your countertop covers most of the surfaces in your kitchen. So it plays a big role in the overall design and the functionality of the kitchen.
A high quality of countertop will not only make your kitchen chores more enjoyable, but also liven up your kitchen with style.
Great countertop surfaces such as the high density quartz stones also possess intrinsic characteristics of being non-porous (thus resistant to harmful bacteria), making it a safe hygienic choice for your family, especially if you have small children.
Credits: Tedid.com.sg
Walls
The walls contribute the base color of the room. So the choice of color is critical, a slight change in color will leave the room with a totally different visual impact. Light colors are typically used as the base color to provide the simplicity and minimalism.
But there are people who prefer to give some sophistication to the walls with the choice of wood series walls.
Aside from the visual aspect, the qualities we find in kitchen walls are their resistance to stains and moisture. It is important to choose walls with a warm, appealing ambiance while being sustainable.
Credits: Archiexpo.com
Flooring
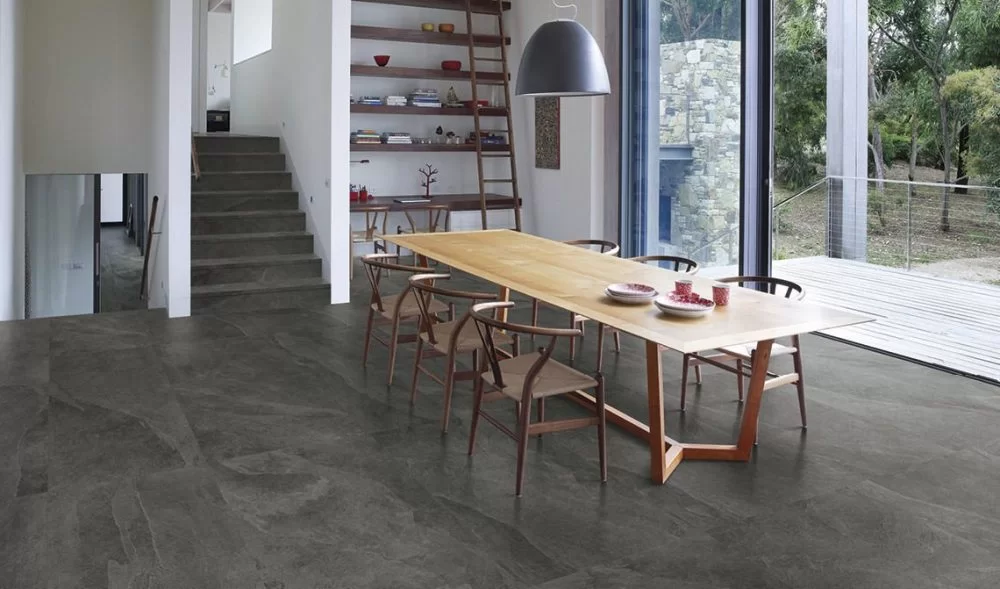
Like other elements in the kitchen, the qualities we desire for the flooring are also its resistance to moisture, scratches, and stains.
The practical usage of the floor is important but it does not have to be dull and boring.
With the right pattern and color of flooring, it will give your kitchen a refreshing and clean look.
The color of the floor decides the mood of the room. Darker colors prompt a more classic presence while lighter colors achieve the effect of minimalism.
In addition, the right flooring allows a smoother interconnection between the rooms in your home.
Credits: Decorpad.com
Cabinets
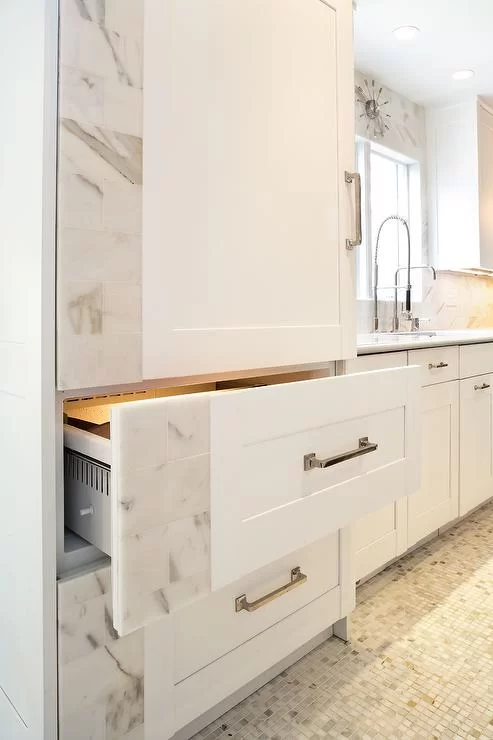
Both cabinets and countertops act as the highlights of the room, bringing a strong visual impact.
The choice of colors for the cabinets and countertops are usually countered to further strengthen the visual shock and create the contemporary atmosphere.
Black and white are mostly preferred, but the combination of gray or dark brown wooden series and white also produces an impressive yet welcoming ambiance. Practically speaking, storage is the main purpose of installing cabinets.
Although some might neglect the usage of the cabinets and care only for the appearance, but they will soon realize its importance when they want some basic parameters to separate wines from knives.
Credits: Elkay.com
Sink
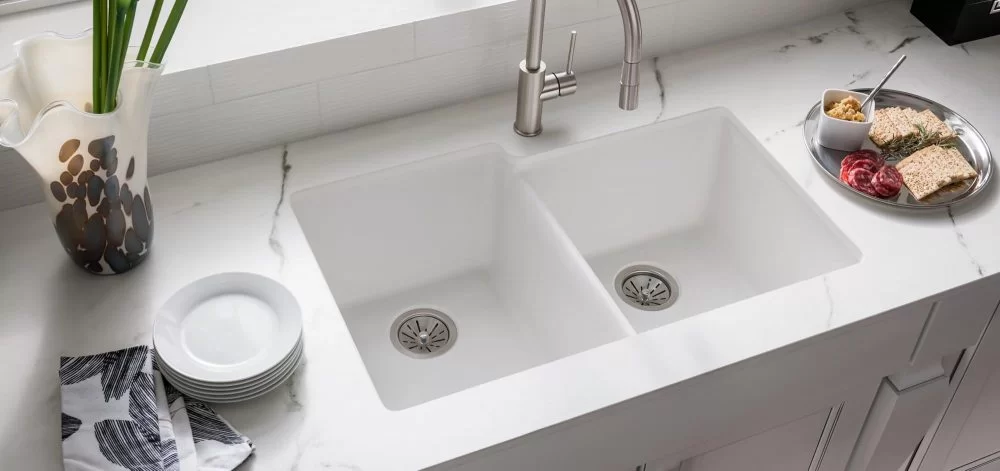
Any chef or home cook will know that the pre and post cooking take most of the time. So a practically designed sink will really come in handy during food preparation and cleaning.
The maintenance aspect is what we should be considering while choosing a sink for your kitchen.
The sink must be easy to clean and does not retain moisture, hindering the growth of algae and clotting of dirt in hard to reach spots.
The appearance of the sink must also be modern to match with the whole room. A coupled marble or quartz countertop for the sink will be a perfect choice for a contemporary kitchen.
Overall, the sink has to be spic and span, as well as stylish and sophisticated at all times.
Before designing your kitchen, the first thing you should do is budgeting. Fridge and cabinets are what you really need.
But if you cook very often, go for the best installations, and take that as an investment in yourself and your family.
A feature wall or an accent wall is a wall that’s made to look unique from the rest of the house.
Through the use of a wide range of materials, feature walls are an amazing way of making a space feel truly special, embodying the persona of the homeowner that few other ways can.
How To Get The Right Walls For Your Kitchen & Home
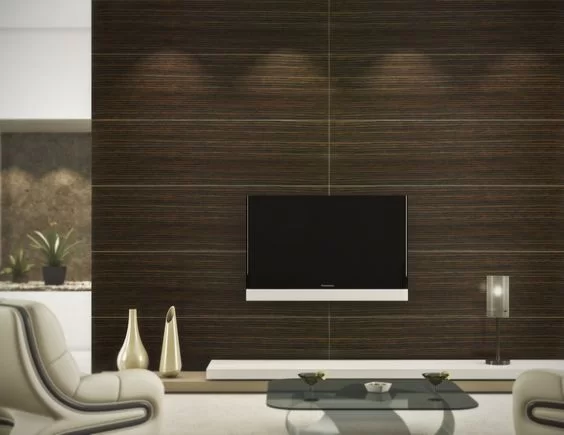
1. Wood Veneers Feature Wall
Made from thin slices of wood glued onto a core panel, wood veneers have always been a favorite with homeowners looking for a warm and natural look.
The quality and durability of wood veneers vary a lot depending on the material used.
Some individuals prefer wood veneers because of its low ecological impact and non-toxicity (unless treated).
2. Wallpapers Feature Wall
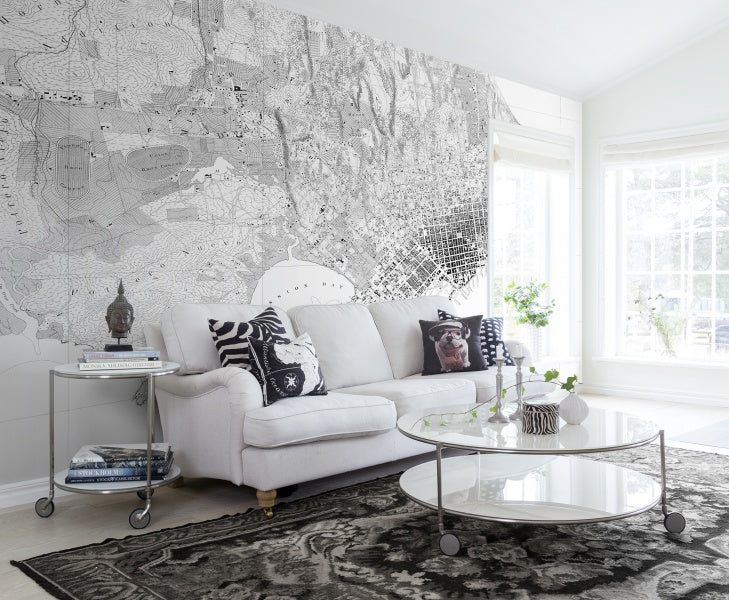
The most inexpensive option on our list, wallpapers are highly customizable and can be used to fit a wide variety of styles.
Some wallpapers even come with textures and do a decent job at mimicking more expensive materials.
Wallpapers today are made using a number of techniques including gravure printing, surface printing, rotary printing and digital printing.
Exceptionally high-quality prints, sometimes called graphic panels, can look really impressive.
There are a few downsides to wallpaper, however. Fancy as they are, wallpapers look pretty dull compared to other materials.
To make matters worse, wallpapers don’t stand up well to moisture and hot climates and will start peeling or fading quickly.
3. Marble Feature Wall
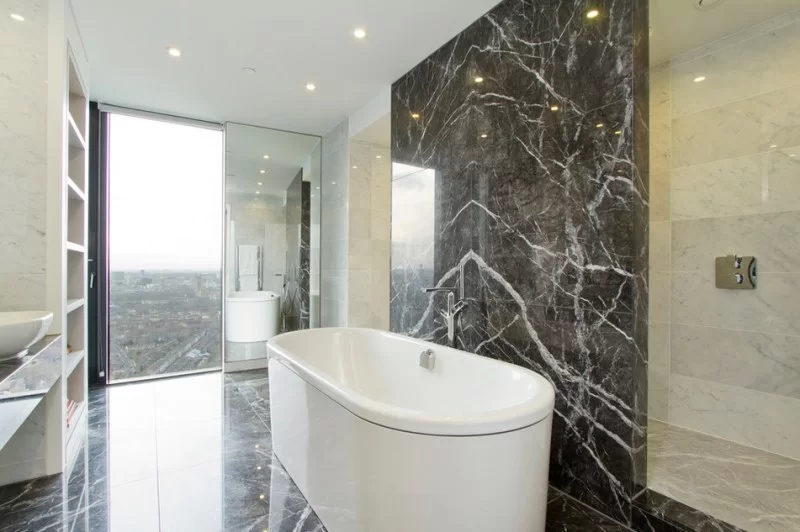
Elegant and classy, thin slabs or bricks of marble are the perfect feature wall material for kitchens, living rooms and bathrooms.
Marble gives off a clean but dramatic look that’s impossible to achieve through any other way.
The catch? High-quality marble is expensive and requires special maintenance to keep its shine going. Goes well with ceramic bathrooms.
4. Slate/Stone Veneer Feature Wall
Stone veneers are made by either pouring a lightweight concrete into a polymer base which is then coloured to look like real stone, or manufactured by layering a thin piece of stone onto a composite base.
They are relatively inexpensive compared to natural stone and come in a variety of designs and colours.
The disadvantages? Stone veneers aren’t as tough as natural stone, and eco-conscious individuals will not be happy with the amount of waste that’s associated with its production.
5. Fiber Metal Feature Wall
Typically made by bonding metal layers to a composite base, fiber metal panel laminates combine high durability into a shiny package and are highly resistant to metal fatigue, impact, corrosion and fire.
Fiber metal panels are also lightweight which helps them stay attached to the walls better.
6. Solid Phenolic Panels
Made from paper soaked in heat-resistant resins and reinforced with cellulose fibres under high pressure, solid phenolic panels are a solid choice that will not disappoint.
Non-porous and resistant to damage from moisture and heat exposure and affordable, solid phenolic panels are the go-to choice for practicality.
In addition, solid phenolic panels are excellent noise barriers and provide a decent level of noise reduction in closely packed apartment spaces.
7. Fabric Feature Wall
Often overlooked by the average homeowner, fabrics are another highly customizable option that can be super personalized.
Sharing some similarities to wallpaper, fabrics vary greatly in cost, aesthetics and durability depending on its type.
Keep in mind that fabrics, however, that fabrics can be difficult to clean if they get dirty and have a tendency to grow moldy if exposed to moisture and humidity (the number one reason why it’s not too popular here).

8. Venetian Plaster Finish
Made from a mixture of slaked lime and marble dust, Venetian plaster finishes, when done right, look absolutely stunning.
The material attaches itself well to drywall, wood, tile, cement or brick walls and dries to a solid hardness.
It is also easy to maintain: plaster dries quickly and its color comes from the pigments mixed into it which doesn’t fade like paint does.
Non-toxic and all-natural, plaster is also eco-friendly choice that’s naturally insulating and anti-bacterial with its high pH.
Feel free to give us a call or email for any inquiries!
Visit SevenKonzept to get services and tips of Interior Designs.
Other Popular Reads:
Lucky Dates to Renovate/Redecorate your Home for 2017 & 2018.
Proper Care and Maintenance of Solid Surface Countertops.
How To Arrange Your Kitchen Neatly
You’ve gone through the hassle of hunting, designing, and bargaining for the perfect kitchen top.
You enjoy cooking and baking for your family every day, and showing off your gorgeous kitchen to your friends and relatives during their short visits and special occasions.
But we both know there’s the other side of the coin… the tiring housekeeping to keep your luxury kitchen top in perfect condition always.
Well, if you’ve been spending too much time and energy daily trying to keep your kitchen spick-and-span, here are 13 nifty storage hacks to keep your kitchen top tidy and beautiful always…
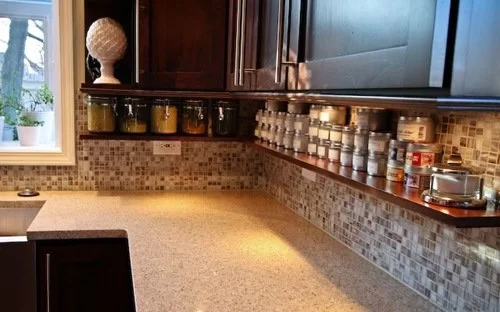
1. Spice Shelves Under Your Upper Cabinets
If you cook frequently, one of the biggest sources of clutter on your kitchen top would be the spices.
Instead of scattering them around, or just chucking them into a drawer, you can actually have a simple shelving to store them right under your upper cabinets.
This way, you’re making full use of the empty space between the upper kitchen cabinets and your kitchen top.
It is so much easier to reach them while you’re busy cooking — and in fact, when placed nicely, they’ll become part of your “kitchen decoration” too.
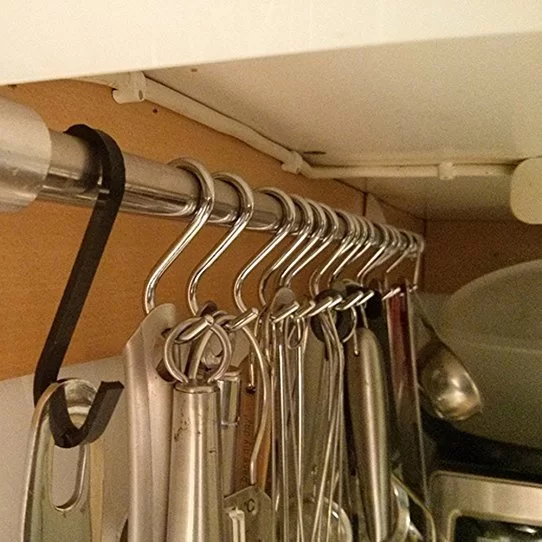
2. Curtain Rod with Hooks for Kitchen Utensils
Now, this is a handy kitchen storage hack we love. You can DIY this very easily by repurposing an old curtain rod and some simple hooks to hang your arsenal of kitchen utensils, and even some mini pots and pans.
It’s a great way to save space on your kitchen top and make full use of your kitchen backsplash.
Plus, it’s definitely easier to grab the utensils you want from the hooks – than from a messy bunch in a dish basket (whether it is to rush a quick meal, to fend off a villain – or to intimidate your mischievous kids).
3. Floating Shelves at the Side of Your Kitchen Cabinets
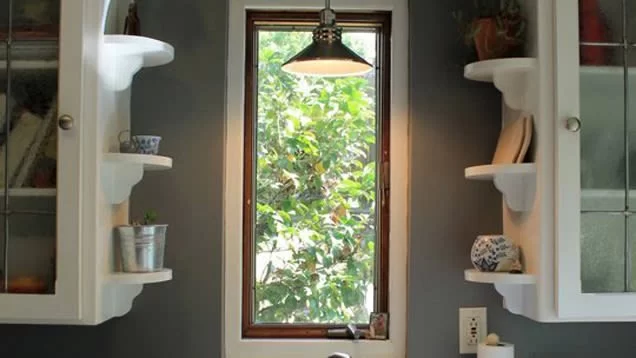
This is one mini kitchen storage hack that most homeowners would not think of — the simple additions of floating shelves at the side of your lovely kitchen cabinets, whether you have a minimalist or luxury kitchen cabinet set.
In fact, when done properly, these floating shelves can truly beautify your kitchen cabinet.
While giving you highly useful storage space, whether it’s for your cooking pots and pans, spices, recipe books.
Or even just for you to place some pots of greenery for a soothing ambience (or even some art pieces to give your kitchen more character).
Now, if you’re renovating or remodeling your kitchen soon, be sure to include this in your design… and let your friends and loved ones marvel at your ingenuity!
4. Pull-Out Utensil Bin
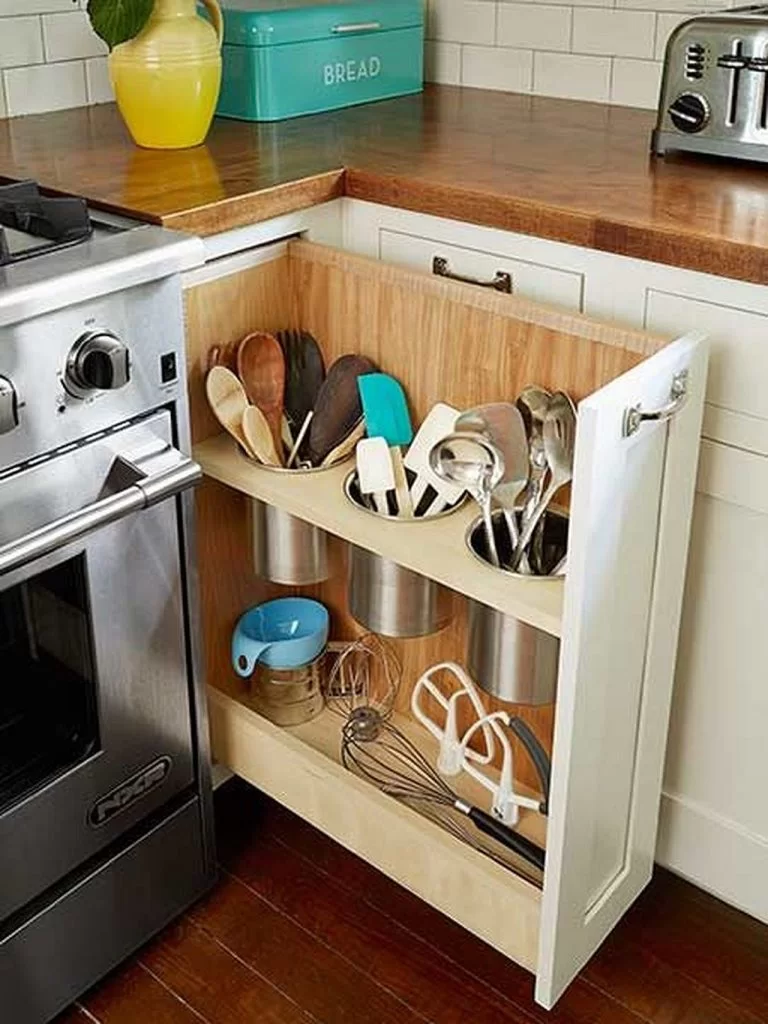
Know that awkward and irritating space at the corner of your L-shape cabinet? Well, you can actually make good use of this pesky corner by building a pull-out utensil bin.
No more blood-boiling moments of struggling to reach for your stuff in the dark corner, no more accumulation of dust and infestation of cockroaches… because now you’ll be happy to keep your frequently-used utensils there.
5. Kitchen Cabinet Lazy Susan
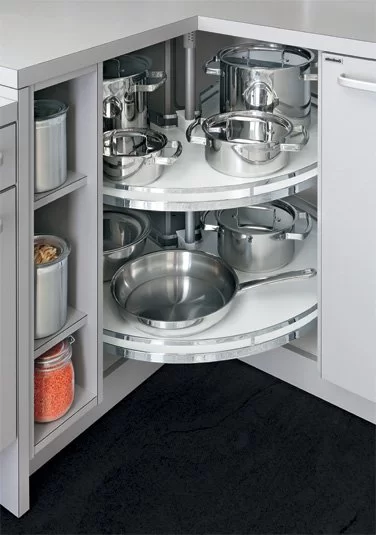
Another alternative of fully utilizing your pesky L-shape kitchen cabinet corner is to use the Lazy Susan there to store your cookware for easy retrieval.
We’ve known a number of homeowners who prefer to hide their cookware than displaying them, whether it’s placing them on the kitchen top or hanging them on hooks.
Of course, instead of storing your cookware, you can choose to keep other stuff like your dry goods here (but no tidbits, please — you wouldn’t want to risk the invasion by rodents, insects… and of course, your sneaky little kids).
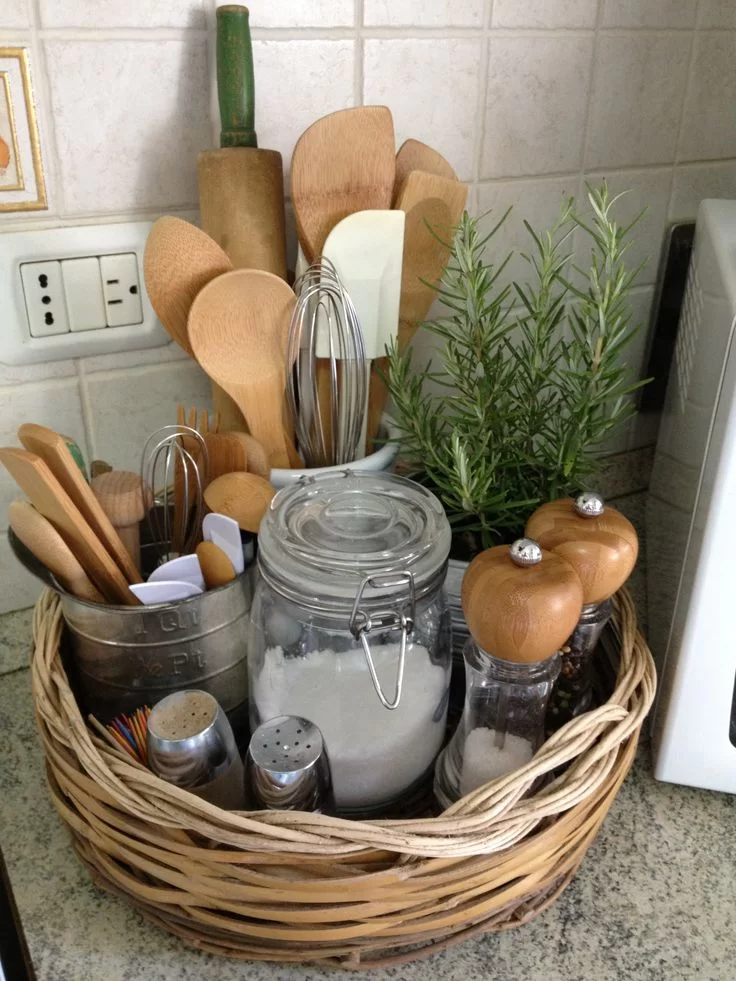
6. The Handy Wide Shallow Basket
Well, sometimes keeping things stupid and simple is the best way to go. No need for fancy ideas to show your organizational prowess, or European designer racks to show off your taste for great style.
That said, having a simple rattan or bamboo wide shallow basket on your kitchen top allows to you chuck your frequently-used utensils, spices, and garnishing all in one place. Besides being a quick and easy storage, this nifty basket can also add a rustic feel to your kitchen.
7. Over-the-Sink Dish Racks
This next kitchen storage hack can literally save your time (and your family’s lives).
Besides saving you prep space on your kitchen countertop, these elegant over-the-sink dish racks can eliminate the hassle of wiping the dishes and ,of course, you’ll have fewer chances of breaking any dishes.
More importantly, (now this is the life-saving part) you wouldn’t have a mosquito infestation problem (compared to chucking your dishes in a regular rack on your countertop).
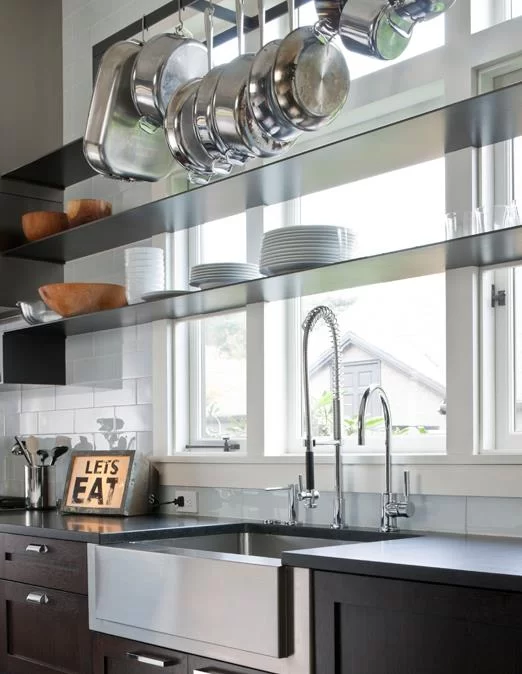
8. Kitchen Window Shelves
This next storage hack is another mini ingenuity. But use this only if you have another window or a back door for fire escape ya…
Because it involves installing a few shelves inside your kitchen windows to provide extra storage space for your cookware and dishes.
This hack alone can save you tons of space on your kitchen countertop — you’ll love this if you’re a minimalist.
In fact, it is a splendid addition if you have some beautiful china or fancy European cookware you wish to flaunt.
If you have little kids, these simple shelves can drastically reduce the chances of them playing with your fragile dishes and causing a havoc when you’re not looking.
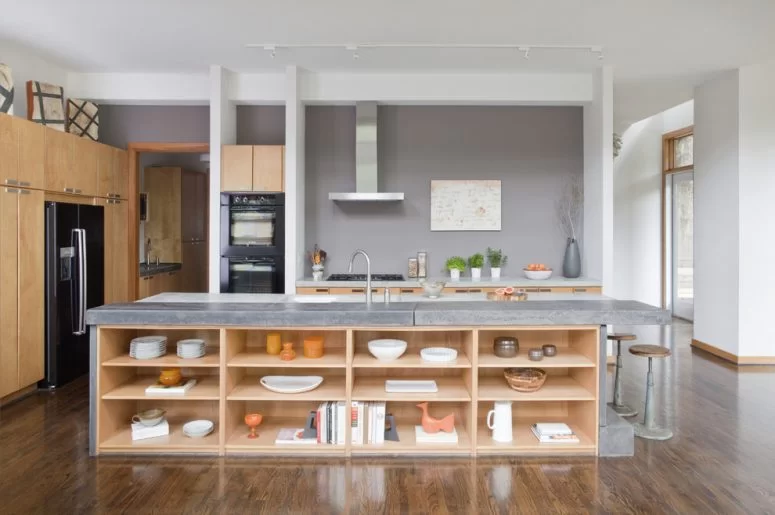
9. Kitchen Island with Open Storage
If you are planning to have a kitchen island, make full use of the space by installing shelves inside the island — so you can stash your cookware, recipe books, and other kitchen items easily.
You can even place your favorite tropical fruits like bananas, pineapples, watermelons, or dragon fruits there, to encourage your kids to love fruits more and also add a touch of nature (and splashes of colors) to liven up your kitchen.
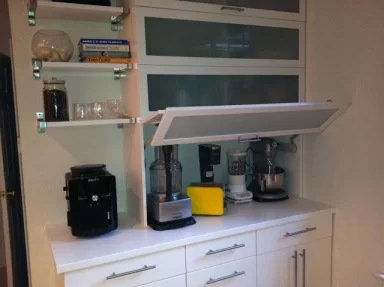
10. Kitchen Appliance Garage
If you have quite a few appliances such as the coffee maker, blender, mixer, or toaster, then you should consider installing an appliance garage.
Because this mini garage will help keep your kitchen top clutter-free in no time, and it’s always wise to keep these dangerous appliances from your kids.
You can choose to conceal them entirely — or if you have a small kitchen, go for the classy translucent design which will make your kitchen look more spacious.
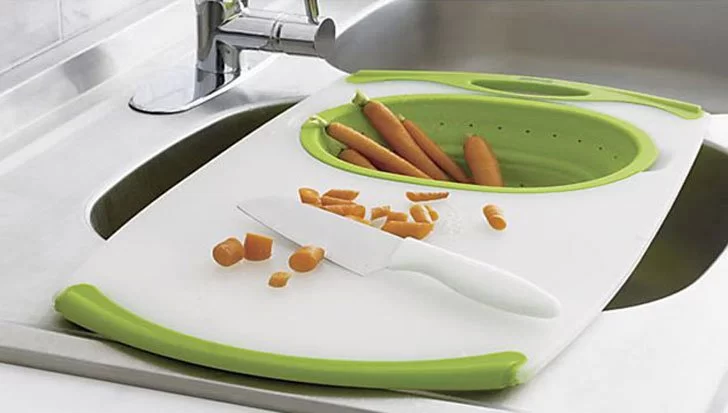
11. Over-the-Sink Chopping Board
This is a no-brainer for savvy housewives, but it’s worth a mention since it’s a great hack to expand your countertop space, albeit temporarily.
There are a variety of designs for this type of large over-the-sink chopping board, and you can get them easily (and cheaply) online from Amazon or Aliexpress.
12. Additional Shelving for Microwave Oven
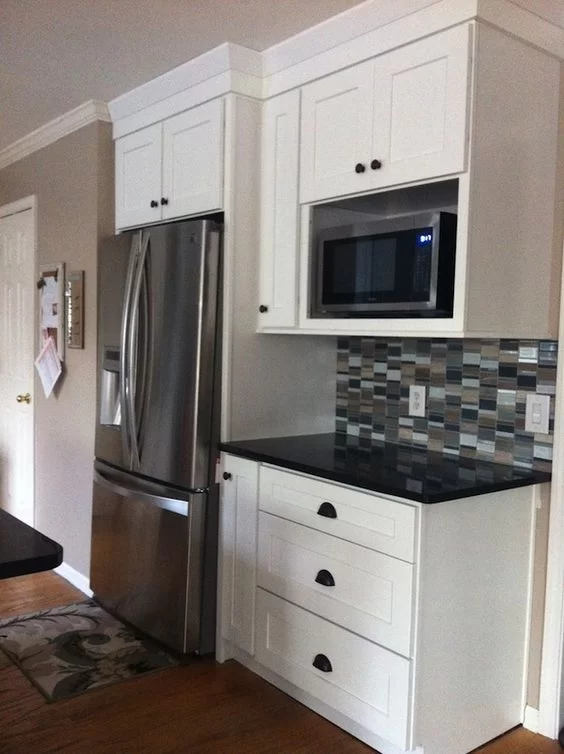
This is another useful hack to free up more space on your kitchen top… the perfect placement of something that you don’t use that much (though some may say it’s something they can’t live without) – the microwave oven.
As most of us rarely fill up our upper cabinets, it’s a wise move to allocate a small portion of it for the microwave oven.
It looks great, you get to look smart for using this hack, and your little kids won’t have the chance to put any metal cutlers inside and blow up your kitchen!
13. Magnetic Knife Strip
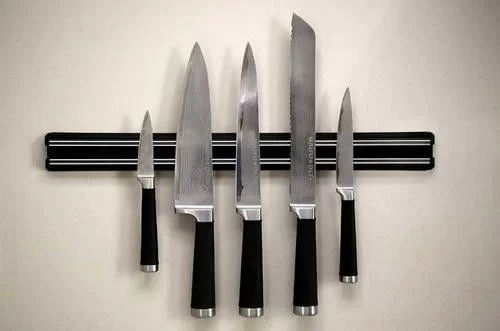
Ok, we’re down to the final kitchen storage hack here – the magnetic knife strip. This is a great way to avoid bacteria infestation (compared to keeping your knives in a wooden knife block). Plus, it’ll look super cool on your gorgeous kitchen backsplash.
And best of all, it’s so much easier to grab (and return) your knives. Just make sure you place them at a safe height where your children cannot reach them.
Alright then, we hope you’ve enjoyed (and will be using) some of these hacks to free up more space on your kitchen top and in your kitchen cabinets.
Now you can keep your kitchen clutter-free and beautiful always with much less effort (and frustrations). That means more time and energy for tender loving care ya! 😉
If you need any super cool advice on home improvement, kitchen renovation, countertop selection, marble polishing, or anything at all… feel free to contact our friendly kitchen top consultants at Stone Amperor. We’re always here for you ya!
We are excited to announce the launch of our customer loyalty program that comes with some awesome perks you’ll love.
Hit us up at +65 8816 4404, or visit us at Primz Bizhub #02-06 to find out more today!
Related Articles:
8 Tricks to Decorate your Counter for Christmas
Life Hacks For A Tiny Kitchen
8 Pros and Cons of materials used in making the countertop
How To Keep Your Kitchen Clutter Free
Did you know that the average adult spends more than three years of their life in the kitchen?
With so much time spent in this culinary workshop, you’d expect it to function like a well-oiled machine. However, with most kitchens being so poorly optimized, the reality for most people is that preparing a meal can feel more like a tiresome game of Tetris as you juggle pots and pans appliances and groceries that ooze from every cupboard.
So in this video, we’ll show you five incredibly simple kitchen hacks you can apply in your house to better use the space you have and transform your kitchen from a place you dread into a well organized creative studio fit for a chef.
if you haven’t check out our tips and tricks in the kitchen be sure to check it out, it will make your kitchen life 10 times easier!
Number One: Appliances
Whether you get by with just a toaster and a kettle, or you collect them like they’re going out of fashion… there’s no escaping the fact that every modern kitchen will have at least a few.
The problem is that they take up tons of working bench space… and unless you’ve bought the expensive designer kind they’re likely to make your kitchen feel more like a stand at a swap meet, rather than a free-flowing work space.
An elegant solution for making your appliances both easily accessible, but at the same time easy to conceal is to move them into a cupboard and convert the standard swing doors into retractable pocket doors.
This way you’ll have unrestricted access to them when you’re using them, but when guests come over, hiding them will be as simple as closing a door.
Obviously, for this solution, you’ll need to have a PowerPoint installed by an electrician, but it’s a small price to pay for the aesthetics and functionality that it will give your kitchen.
Read More: 13 Clever & Simple Storage Hacks for Your Kitchen Top & Cabinets (updated 2018)
Number Two: The Pantry
For most people, the pantry is the most frequently used cupboard in the kitchen. Unfortunately, though it can also be one of the most frustrating, with its deep shelves often forcing you to juggle multiple items from the front in order to access items at the back.
A great way to make every inch of your pantry easily accessible without sacrificing any usable space is to turn your shelves into drawers. This way you can simply pull them out one at a time bringing every single item within an easy reach.
Number Three: The Dreaded Corner Cupboard
Quite possibly the most annoying space in your kitchen… the corner cupboard beneath your bench is home to vast amounts of painfully awkward space.
This is because the front access point is disproportionately more compared to their overall storage area. What you need is a simple way to get items from the back to the front, without having to get down on your knees and reach aimlessly into the abyss.
A great way to do this is to add a lazy susan to each shelf allowing you to rotate items to the front like a carousel. And you can pick these up for a few dollars at your local hardware store.
Related Articles: Lucky Dates to Renovate/Redecorate your Home for 2017 & 2018
Number Four: Pot Storage
Pots and pans are one of those things that you use just about every day… and if you’re like most people you probably have them sitting inside a cupboard stacked on top of each other like a half-finished game of Jenga. And each time you reach for one, you risk the whole stack falling down in a symphony of clanging and banging.
A simple solution is to install a retractable hanging rack allowing you to pull them out like a draw and pick the one you want with ease.
Number Five: Under the Kitchen Sink
Under the sink is a notoriously awkward space mainly because of the plumbing required for draining water.
However just because this space harbors an obstacle doesn’t mean it should be condemned.
By installing custom drawers that navigate the pipes similar to those in the pantry, you can bring typically difficult to access bottles brushes and sponges within an arm’s reach.
Another neat hack is to add small fold down flaps to the very top of this space for even more convenient access to your sponges and brushes (which get used multiple times per day).
To get more storage solution videos like this hit the subscribe button and leave a comment to let me know what you’d like to see next!
Feel free to give us a call or an email.
Curated from Youtube
Popular Reads:
Pros and Cons of Quartz Countertops – All You Need to Know
30 Eco-Friendly Home Cleaning Hacks Using Just 3 DIY Home Cleaners
How To Always Have A Clean Kitchen
A kitchen is like a newborn baby. It requires constant attention. The reason is we are always using our kitchen. It’s the heart of the home. We’re cooking in it. We’re hanging out in it.
I’m looking at my kitchen right now. There is like so much going on. There’s old food. There are frying pans. There’s dirt. There’s dust. There are remnants from whatever I cooked. There are dishes that need to be tended to.
This kitchen gets messy no matter how much we clean it. Many of you have asked me for my kitchen cleaning routine, something that I can show you that I do, which helps manage my kitchen on a day-to-day basis.
I am glad to share it with you. And the frustrating thing about a kitchen routine is it feels like if you let your kitchen go, even for one day, it can feel so overwhelming and out of control.
So I’m going to show you what I do to keep it simple, to keep it quick, and of course to keep my kitchen looking in tip-top shape with minimal effort. Okay. Let’s get to it.
Every morning, while making coffee or tea, empty your dishwasher. A dishwasher should be filled up with items from the night before, ran overnight, and emptied in the morning for a new start to the day.
If you don’t have a dishwasher, place all items on your drying rack away where they belong. It takes me about four minutes to unload a dishwasher. You can certainly spare that while you’re waiting for your coffee.
Wipe your counters and table down after breakfast, and finish off by placing any dishes in the dishwasher. Or hand-washing and placing them on a drying rack, and rinsing and shining your sink before you go.
When everyone gets home from work or school, the rule needs to be that you empty all garbage and containers, and place anything that’s dishwasher-able into the dishwasher.
Or you hand-wash your containers right then and there. Don’t leave anything out because it will pile up.
I can’t even begin to cook dinner unless my kitchen is clean, and that really does require clean counters and a dishwasher that is ready to be loaded.
So that being said, once dinner has been prepared, place all your dishes in the dishwasher or hand-wash them, as well as pots and pans.
Now, if something needs to be soaked, like a heavy-duty dirty casserole, soak it while you’re eating so that it’s got time, and when you’re done eating you can clean it easily.
Set your dishwasher to run overnight, because that’ll help you save on energy and water costs. If you don’t have enough dishes, just leave it until you do have enough to run a full cycle.
Use a cloth and all-purpose disinfecting spray to clean your counters down. You can also do a spot check for fingerprints on doorknobs and cover fronts. This goes for appliances too since they can easily get printed up.
Make sure you include your stove top in the wipe-down as well. Empty your garbage, take out the recycling, and replace liners as required. This will help manage odors.
Keeping your counters clutter-free is really important in maintaining your kitchen. So put everything back in its rightful place. Make sure that your countertop has everything neatly organized.
A little trick I like to do is line everything up parallel and perpendicular to the edge of the counter. That way it looks super-clean.
Spray your sink down with an all-purpose cleaner and sprinkle with an abrasive cleaner like baking soda. Scrub it with a soft sponge, rinse it, and shine it. Remove any debris at the bottom of the sink.
To put the finishing touch in your kitchen, all you need to do is straighten up any tea towels, refill paper towels, and do a super-fast sweep of the floor if needed.
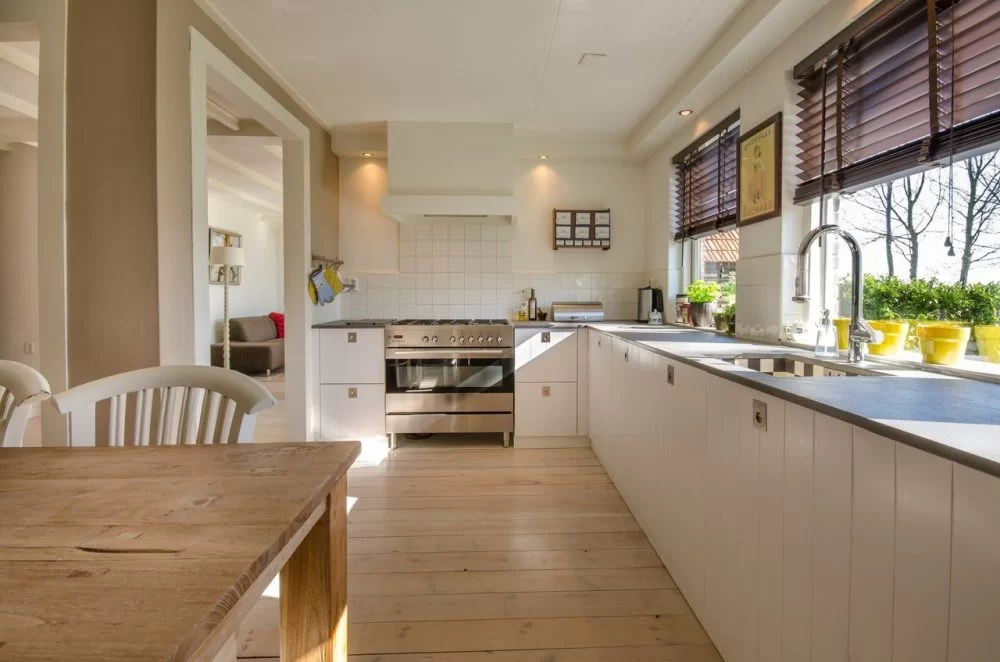
Make sure your kitchen is ready to greet you bright and early tomorrow morning. What I reviewed was just a guideline. It’s designed to sort of help you figure out what you need to do in your kitchen each day.
But if you skip a day, or you don’t do everything perfectly or exactly the way I showed you, that’s okay.
The important part is that you just do something and if you forget to do it one day, don’t beat yourself up. Just pick up and start the next day.
The question I get asked in every routine video is, “How do I get my so and so to help me clean as well?” They’re certainly welcome to watch this video if they’re a willing participant.
You can also have a conversation with them. We have a video about that and I’ll link it for you at the end of this video.
But keep in mind, not everybody thinks the way that you think and you are the one that values a clean space, or you think you could benefit from that clean space.
So if no one is willing to help you, but you really want a clean kitchen, I would just encourage you to do it anyway.
It’s going to benefit you in the long run, because you’re going to feel better about your kitchen, and you get the added benefit of feeling good about yourself because you contributed to making a beautiful space. That’s got to be worth it.
It might feel a little bit cumbersome at first to get into the groove of this routine, but I promise if you put it to the test, feel things out and adjust it based on what you need, it’ll start to feel very natural and you will actually be so happy that you’re doing it because the results are well worth it.
Feel free to give us a call or email us for any inquiries!
[Which natural stone is actually the best option for the kitchen countertop? Check out this to know 8 Pros and Cons of materials used in making the countertop.]
How To Store Kitchenware The Smart Way
Did you know that the average adult spends more than three years of their life in the kitchen?
With so much time spent in this culinary workshop, you’d expect it to function like a well-oiled machine.
However, with most kitchens being so poorly optimized, the reality for most people is that preparing a meal can feel more like a tiresome game of Tetris as you juggle pots and pans appliances and groceries that ooze from every cupboard.
So in this video, we’ll show you five incredibly simple kitchen hacks you can apply in your house to better use the space you have and transform your kitchen from a place you dread into a well organized creative studio fit for a chef.
if you haven’t check out our tips and tricks in the kitchen be sure to check it out, it will make your kitchen life 10 times easier!
Number One: Appliances
Whether you get by with just a toaster and a kettle, or you collect them like they’re going out of fashion… there’s no escaping the fact that every modern kitchen will have at least a few.
The problem is that they take up tons of working bench space… and unless you’ve bought the expensive designer kind they’re likely to make your kitchen feel more like a stand at a swap meet, rather than a free-flowing workspace.
An elegant solution for making your appliances both easily accessible, but at the same time easy to conceal is to move them into a cupboard and convert the standard swing doors into retractable pocket doors.
This way you’ll have unrestricted access to them when you’re using them, but when guests come over, hiding them will be as simple as closing a door.
Obviously, for this solution, you’ll need to have a PowerPoint installed by an electrician, but it’s a small price to pay for the aesthetic and function that it will give your kitchen.
[ Related Articles: 13 Clever & Simple Storage Hacks for Your Kitchen Top & Cabinets (updated 2018) ]
Number Two: The Pantry
For most people, the pantry is the most frequently used cupboard in the kitchen. Unfortunately, though it can also be one of the most frustrating, with its deep shelves often forcing you to juggle multiple items from the front in order to access items at the back.
A great way to make every inch of your pantry easily accessible without sacrificing any usable space is to turn your shelves into drawers. This way you can simply pull them out one at a time bringing every single item within an easy reach.
Number Three: The Dreaded Corner Cupboard
Quite possibly the most annoying space in your kitchen… the corner cupboard beneath your bench is home to vast amounts of painfully awkward space.
This is because the front access point is disproportionately more compared to their overall storage area. What you need is a simple way to get items from the back to the front, without having to get down on your knees and reach aimlessly into the abyss.
A great way to do this is to add a lazy susan to each shelf allowing you to rotate items to the front like a carousel. And you can pick these up for a few dollars at your local hardware store.
Related Articles: Lucky Dates to Renovate/Redecorate your Home for 2017 & 2018
Number Four: Pot Storage
Pots and pans are one of those things that you use just about every day… and if you’re like most people you probably have them sitting inside a cupboard stacked on top of each other like a half-finished game of Jenga.
And each time you reach for one, you risk the whole stack falling down in a symphony of clanging and banging.
A simple solution is to install a retractable hanging rack allowing you to pull them out like a draw and pick the one you want with ease.
Number Five: Under the Kitchen Sink
Under the sink is a notoriously awkward space mainly because of the plumbing required for draining water.
However just because this space harbors an obstacle doesn’t mean it should be condemned. By installing custom drawers that navigate the pipes similar to those in the pantry, you can bring typically difficult to access bottles brushes and sponges within an arm’s reach.
Another neat hack is to add small fold down flaps to the very top of this space for even more convenient access to your sponges and brushes (which get used multiple times per day). To get more storage solution videos like this hit the subscribe button and leave a comment to let me know what you’d like to see next!
Feel free to give us a call or an email.
People Also Watch:
1) Pros and Cons of Quartz Countertops – All You Need to Know.
2) Kitchen Top Edge Profiles in Singapore – Styles and How They Fit in with Your Home.
3) Daily Kitchen Cleaning Routine – by Clean My Space
4) 30 Eco-Friendly Home Cleaning Hacks Using Just 3 DIY Home Cleaners
How To Make Your Kitchen Child-Friendly
There is never an easy way to put this: As a parent, it’s natural to become neurotic over the safety of your child. That parental instinct is a contributor to your very existence.
Your parent most likely hovered over you as a child. When danger struck, he or she would whisk you away to safety, reprimanding you for your curiosity and inspecting your person for possible damage.
It’s a familiar feeling. Our infantile minds may have once thought this was a tad overbearing but, well, we didn’t know better.
This instinct is the reason we spare no expense at baby proofing your kitchen.
Yes, the kitchen is the single most dangerous place in the home for a baby. Knives, stoves and heavy appliances are baby “landmines” that we have to make like the UN in Cambodia and remove.
So how does an average mother in suburbia acquire the professional skills of weapons disarmament personnel?
We’ve got you covered. Consider these tips all the basic training you need:
1. Block Kitchen Doors With Safety Gates and Dutch Doors
To keep baby out, its best to block the entrances and exits of the kitchen with safety gates. These can be around 2 feet high and will keep your grabby toddler at bay.
The trouble is, things get meddlesome. Constantly having to lock in and out of place can drive any good-natured parent irate.
If money is no object, its best to get a dutch door. These unique devices split in half and both ends can latch individually or together. It’s beautiful and functional.
Kitchen countertops in quartz are a great look for any kitchen. Look no further for the best kitchen countertops prices. Stone Amperor is Singapore’s best retailer and can help you with all your kitchen countertop ideas.
2. Latch All Cupboards and Drawers
Drawers and cupboards are the devil. A toddler loves to yank them open and explore what’s inside.
The consequence of their curiosity: a pinched finger at the hinges, contents falling on your little one or the sharp edges of the woodwork cutting their fingers.
Begone with the Boo Boos. Latch em all up.
A cheap and efficient latch is easy to find at your local hardware store, if you’re handy with a drill bit and screws, it’s a piece of cake to install. Or if you’re not, then bribe a friend with a pot roast and a six-pack.
3. Keep Dangerous Items Stored Safely
Convenience is a luxury you can no longer afford. Not with a grabby toddler on the loose. Keep your chemicals and other hazardous items off the edge of countertops, or better yet, latched up in a cupboard.
The same goes for fridge magnets and smaller objects that are small enough to fit in their teeny tiny mouths. Routinely inspect your kitchen for stray choking hazards.
Power sockets lower than 3 feet from the floor need covering. Finding a plastic cover is fairly easy. Any hardware store worth its wares will always keep them in stock.
4. No Tablecloths and Runners
Toddlers tend to tug at tablecloths and runners. This is a nightmare waiting to happen.
The horror of a table setting being scattered to the ground by an errant toddler is very real. Often resulting in broken dishes, you don’t want your toddler to get hit by a flying utensil.
Kiss tablecloths goodbye.
5. Stove Guards Are A Must
You can baby proof your stove by getting baby proof stove knobs. They don’t cost much and it beats having to remove your stove knobs all the time.
These tips will save you a lot of grief. Yet nothing works as well as teaching your child with positive reinforcement. This bears repeating. Love and constant reminders always work best.
If you have questions about kitchen countertops options and how to baby proof them, consider neutral kitchen countertop materials with beveled or rounded edges.
Stone Amperor offers a wide range of sink sizes and configurations to fit the needs of every homeowner.
How To Install An Undermount Sink
In this blog post, we’ll talk about how to install an undermount sink onto a granite countertop (always be sure to follow any specific installation instructions provided by your countertop manufacturer).
1. Preparation
Gather the right tools for the job. For safety and ease, Stone Amperor recommends using the following:
- a drill
- a drill bit
- flathead or Philips screwdriver
- caulk
- caulk gun
- denatured alcohol
- tape measure
- tape
- safety glasses
- gloves
2. Measure And Cut the Hole For The Sink
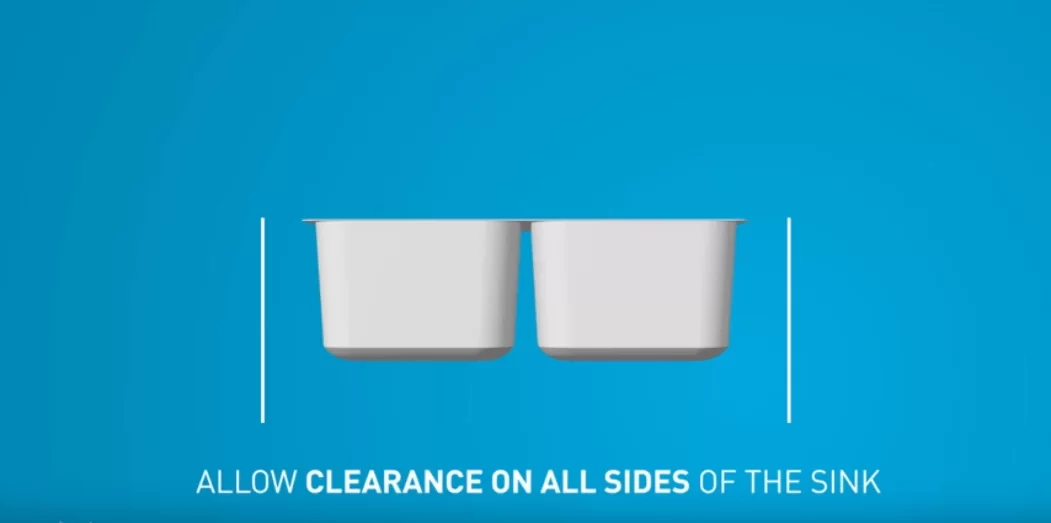
Determine where the sink should be positioned on the countertop. Make sure there’s enough clearance on all sides of the sink.
Underneath the countertop, carefully tape the template to the countertop and use the appropriate saw to cut the hole. If you want a negative review, cut the hole slightly smaller than the template.
For a positive reveal, cut slightly larger… and for a flush mount cut the exact measurement of the template.
3. Attach The Sink to the Countertop
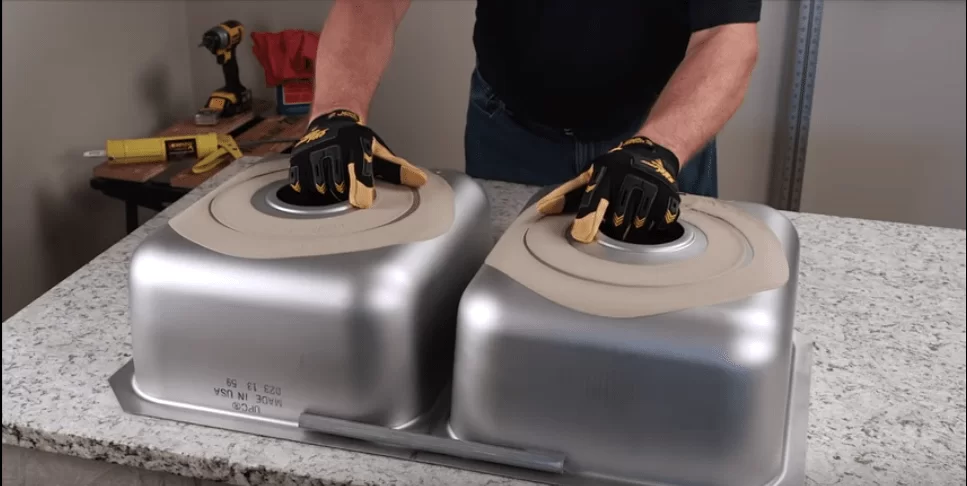
This should be done before installing the countertop. Clips are included with your sink. Your countertop fabricator will supply the proper hardware to attach the sink to the countertop. Solid surface countertop hardware requirements may vary.
With the countertop upside down, clean the counter hole and sink. Rim it with denatured alcohol. Position the sink over the counter hole and mark the guidelines.
For proper placement, apply a bead of caulk at 1/8 to 1/4 inch in diameter along the edge of the hole. Place the sink on the countertop, then attach it to your mounting hardware. The edge of the clip should overlap the sink ledge.
Once the countertop is installed, wipe any excess caulk from the sink rim, and finish up by connecting the faucet and drain fittings. Congratulations, your job is complete.
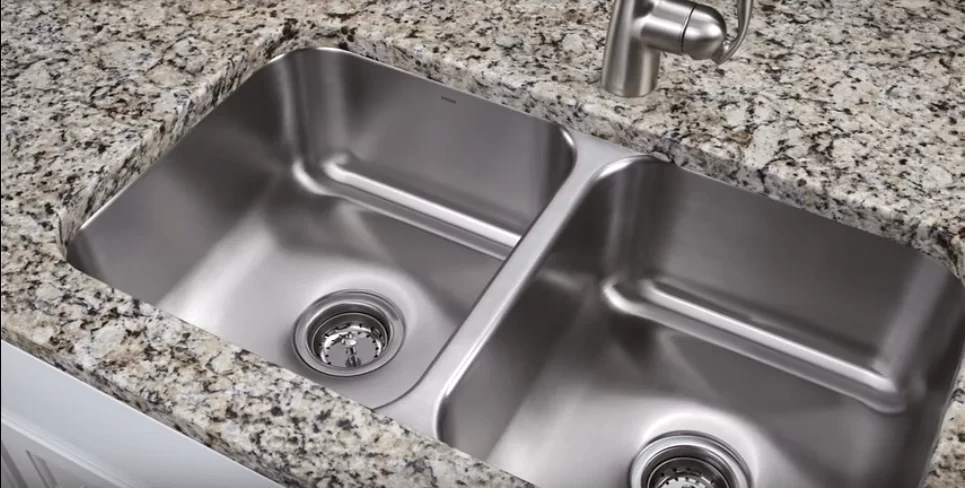
Installing an under mount sink can be complicated, so if you doubt your DIY prowess, let the professionals at Stone Amperor do it for you.
How To Install A Flushmount Sink
Today, we will show you how to install a flushmount sink. A flush mount sink installation, is where the flushmount sink is at the same level of the slab on which it is fitted. This is different from an undermount sink.
To avoid any kind of slipping, or getting hurt from rough or hard edges, we recommend using protective gloves from either cloth or rubber.
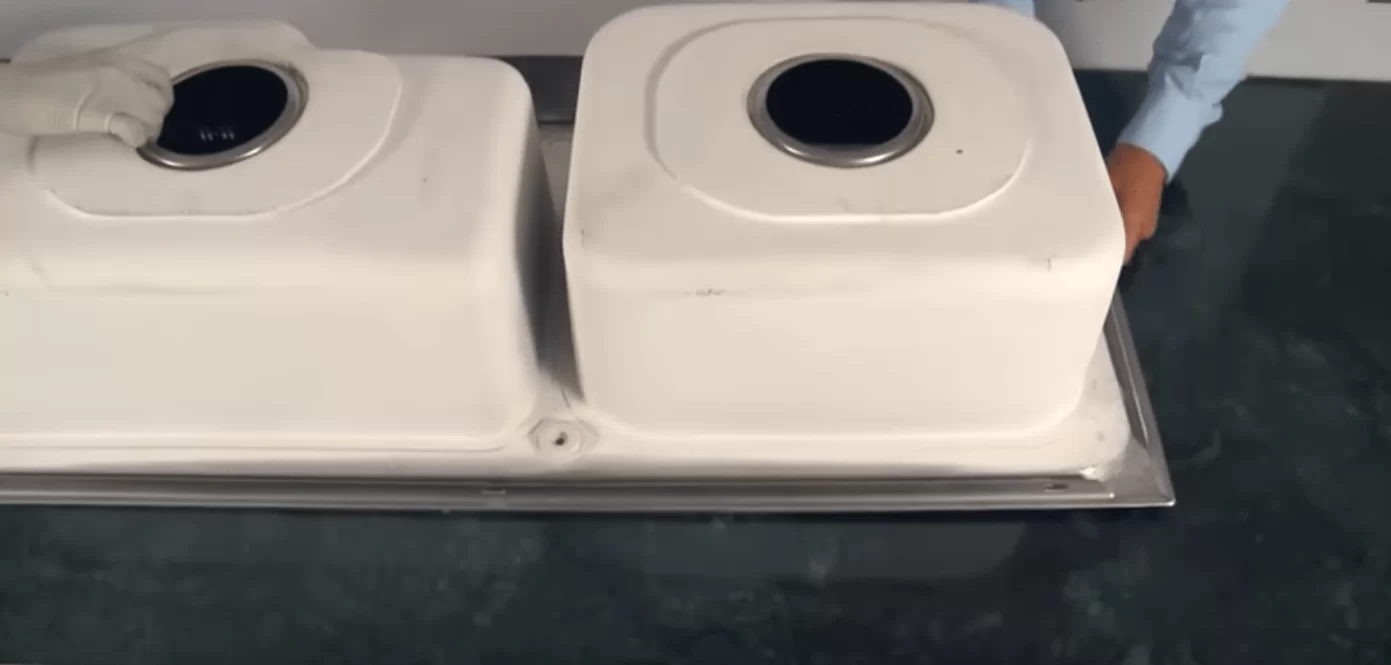
Place the flushmount sink on the slab on which it will be fitted. Turn it upside down and mark the area to be cut on the slab. On the edge of the slab from, where we will use the sink, take a marking pen that contrasts in color, and mark a point at about two to four inches as per your preference.

This will be the gap between you and the flushmount sink. Make these markings at least at three positions along the same edge. Draw a straight line connecting these marks. Align the sink edge with this line. Now mark the outer periphery on the three remaining sides. Please take care and ensure that the sink doesn’t shift from its position. Otherwise the markings will deviate.

Remove the sink, and you can see the outer marked boundary. Inside this outer boundary, mark a distance of 10 mm on all four sides. Connect each new point with a straight line and you will get another rectangle inside the earlier one you made.
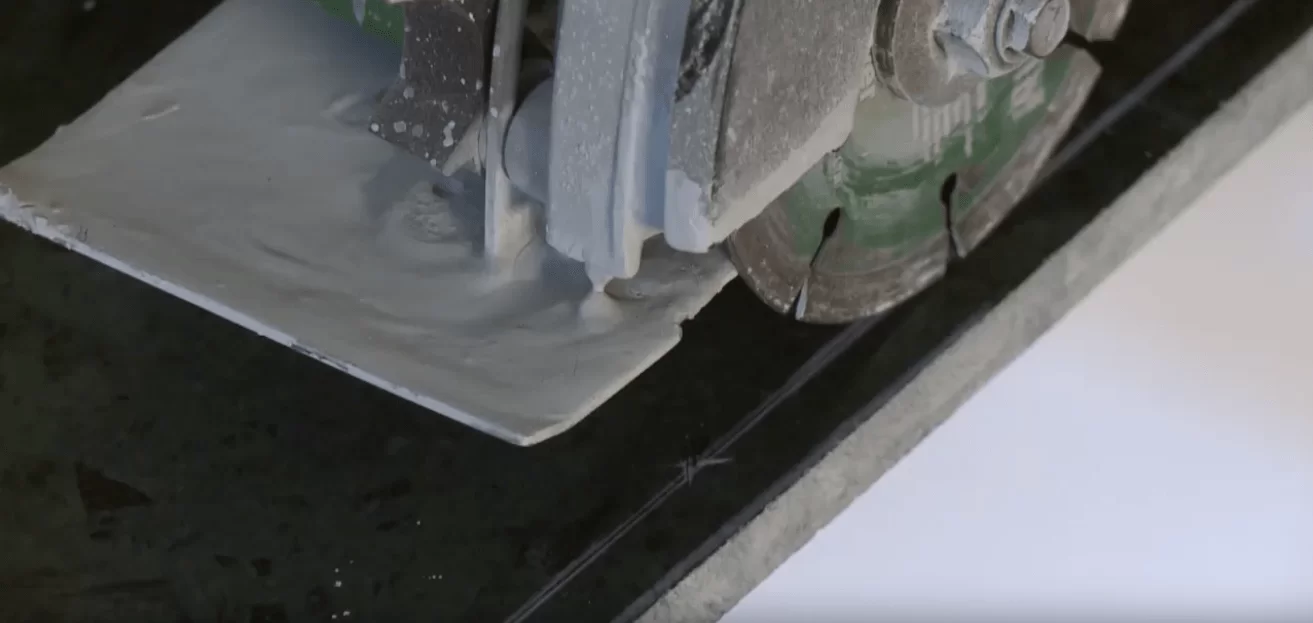
Cut straight through the inner boundary and all hollow out to the full depth of the slab on all the four sides. This is the cavity for inserting your sink. Now on the marked outer boundary, make a cut that is 10 mm wide and 6 mm deep.
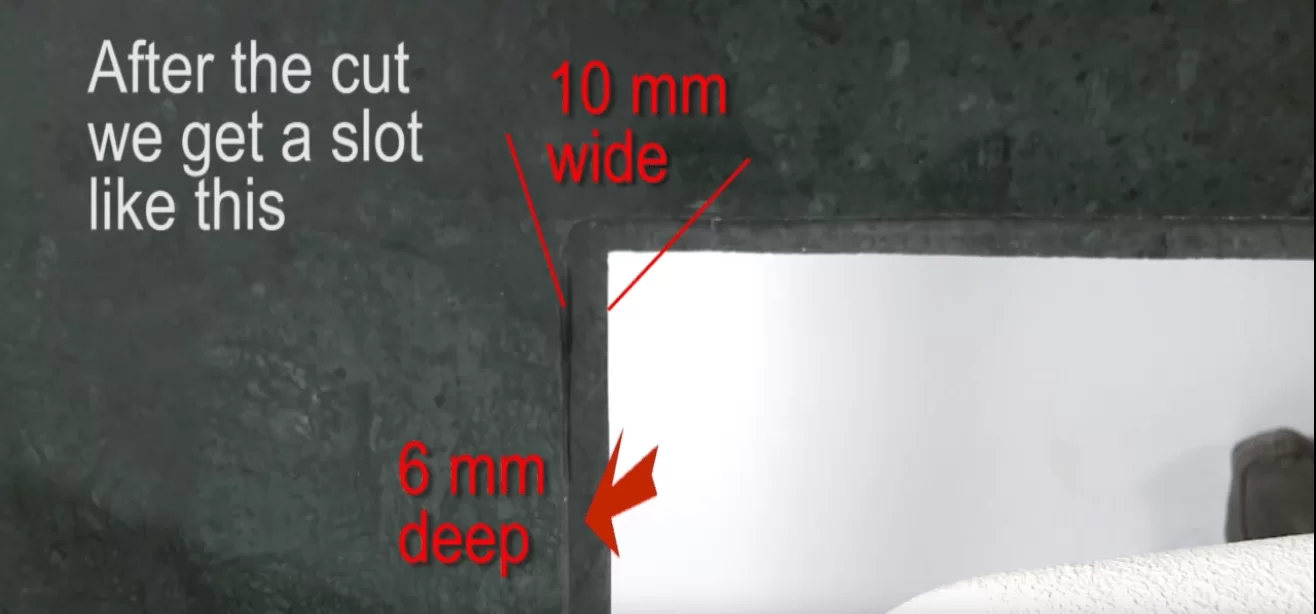
This is how the l-shaped cut will look like once the cavity and the shoulder of the slab are ready. Take the sink and fit the faucets, hand shower, soap dispenser and couplings with the sink upside down. Use a black sealing tape and apply on the outermost edge.
The adhesive on the tape will stick nicely to the stainless steel sink. After fixing it on all four sides, overturn the sink, lower it into the cavity and ensure that the sink rests properly on the six mm deep cut shoulder of the slab.
Get under the sink, use a holding clamp and place it in the under slot of the sink. Tighten it on the slab to the extent that the upper edges of the sink are level or flush with the slab .Put a few more clamps all around the flushmount sink.
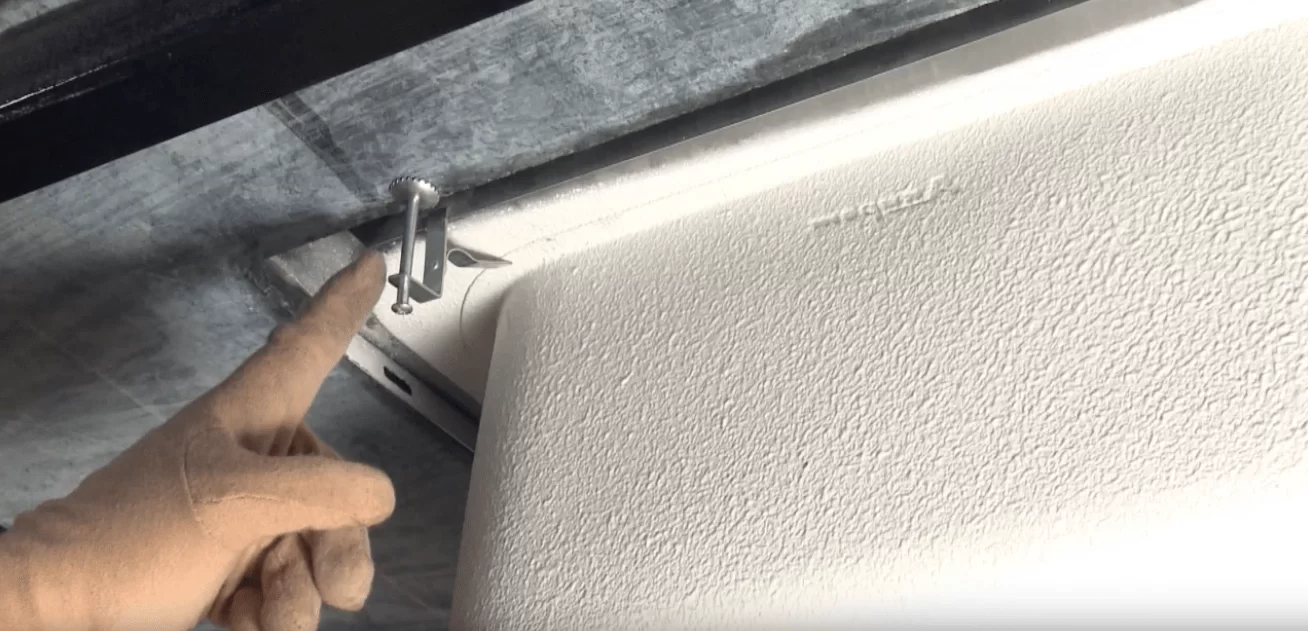
Your sink is now well balanced and securely fastened from below. Place the supplied masking tape on the sink, on all four sides exactly from the outermost edge. Fill silicon between the sink and the slab and dab it gently. This will fill any vacant space.
Clear any extra silicon. the masking tape will protect the upper edges of the sink from the drying silicon. When silicon is dry, remove the masking tape and then the green colored protective covering.
Your sink is now ready to use. We highly recommend installing the drain pipes before you lower the sink in the cavity.
For any assistance, let the amazing folks at Stone Amperor help you.
As found on Youtube
Which natural stone is actually the best option for the kitchen countertop? Check out this to know 8 Pros and Cons of materials used in making the countertop.
[vc_btn title=”GET INSTANT QUOTE TODAY” color=”warning” size=”lg” align=”center” css_animation=”bounceIn” link=”url:https%3A%2F%2Fwww.stoneamperor.com.sg/instant-countertop-quote||target:%20_blank|” css=”.vc_custom_1526456146325{padding-top: 20px !important;}”]
How To Set Up A Kitchen For Dummies
Choosing installations for your kitchen that could give rise to a contemporary aura has always been a challenge. In fact, the most significant elements in the kitchen are the ones easily neglected.
Back in the days, the kitchen was always designed to be a confined and isolated space. Today, people want a spacious and comfortable kitchen not only for cooking, but to allow a better flow in spatial change between the rooms of the house.
Contemporary kitchens are the trend to follow and it is what the world is looking at right now. A minimalist layout with the simplicity of the color choices for the room defines a contemporary room.
But to create a functional and modern kitchen is not as easy as it sound. Here are a few essential elements to emphasize while designing your desired contemporary kitchen.
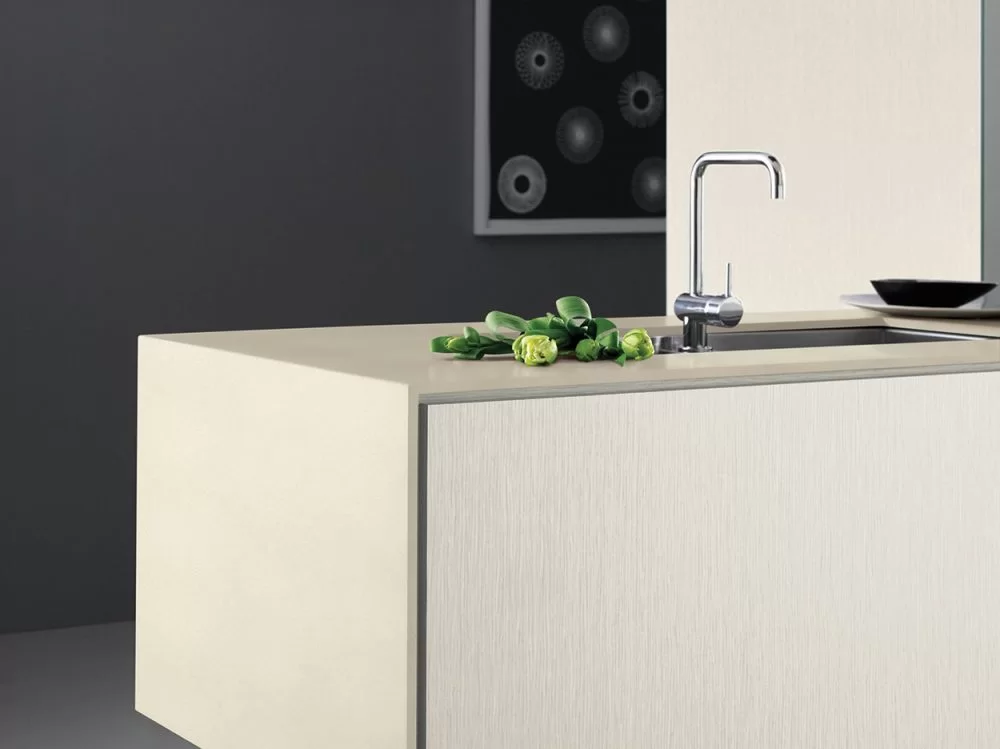
Countertops
Your countertop covers most of the surfaces in your kitchen. So it plays a big role in the overall design and the functionality of the kitchen.
A high quality of countertop will not only make your kitchen chores more enjoyable, but also liven up your kitchen with style.
Great countertop surfaces such as the high density quartz stones also possess intrinsic characteristics of being non-porous (thus resistant to harmful bacteria), making it a safe hygienic choice for your family, especially if you have small children.
Walls
The walls contribute the base color of the room. So the choice of color is critical, a slight change in color will leave the room with a totally different visual impact.
Light colors are typically used as the base color to provide the simplicity and minimalism.
But there are people who prefer to give some sophistication to the walls with the choice of wood series walls.
Aside from the visual aspect, the qualities we find in kitchen walls are their resistance to stains and moisture.
It is important to choose walls with a warm, appealing ambiance while being sustainable.

Flooring
Like other elements in the kitchen, the qualities we desire for the flooring are also its resistance to moisture, scratches, and stains. The practical usage of the floor is important but it does not have to be dull and boring.
With the right pattern and color of flooring, it will give your kitchen a refreshing and clean look. The color of the floor decides the mood of the room. Darker colors prompt a more classic presence while lighter colors achieve the effect of minimalism.
In addition, the right flooring allows a smoother interconnection between the rooms in your home.
Cabinets
Both cabinets and countertops act as the highlights of the room, bringing a strong visual impact.
The choice of colors for the cabinets and countertops are usually countered to further strengthen the visual shock and create the contemporary atmosphere.
Black and white are mostly preferred, but the combination of gray or dark brown wooden series and white also produces an impressive yet welcoming ambiance.
Practically speaking, storage is the main purpose of installing cabinets.
Although some might neglect the usage of the cabinets and care only for the appearance, but they will soon realize its importance when they want some basic parameters to separate wines from knives.
Sink
Any chef or home cook will know that the pre and post cooking take most of the time. So a practically designed sink will really come in handy during food preparation and cleaning.
The maintenance aspect is what we should be considering while choosing a sink for your kitchen.
The sink must be easy to clean and does not retain moisture, hindering the growth of algae and clotting of dirt in hard to reach spots.
The appearance of the sink must also be modern to match with the whole room.
A coupled marble or quartz countertop for the sink will be a perfect choice for a contemporary kitchen. Overall, the sink has to be spick and span, as well as stylish and sophisticated at all times.
Before designing your kitchen, the first thing you should do is budgeting.
Fridge and cabinets are what you really need. But if you cook very often, go for the best installations, and take that as an investment in yourself and your family.
Every kitchen countertop deserves a touch of your personal decor taste.
Tacky nick knacks won’t cut it. Find your style with our easy tips:
After you’ve convinced your partner to get a beautiful countertop, what’s next? The first few weeks are glamorous.
You’d rather leave it untouched. In such pristine condition, having dinner parties and inviting guests seems very alluring.
Having seen minimalist trends in interior decorating magazines, you may get tempted to keep your counters plain and clutter free.
The fact is, minimalism is a permanent lifestyle choice, much like vegetarianism. If the idea of removing personal effects and all signs of taste is enough to repel you, then you need to style it to reflect your taste.
Here’s how:
Add Flowers and Plants
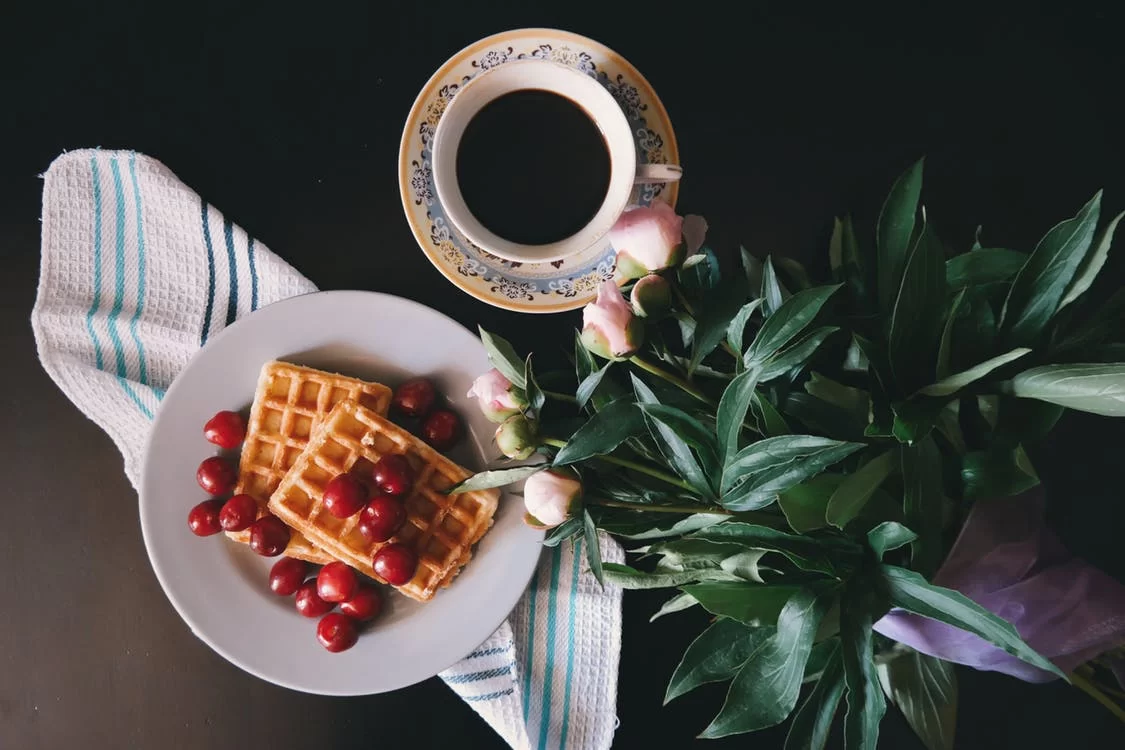
Fresh cut flowers are a great centerpiece for any countertop. For light colored stone like white marble, it’s best to stick to bright colored flowers like roses, dahlias and anthuriums. Darker stones like granite and quartz work well with lilies and plumerias.
To add functionality, try growing fresh herbs like basil and bay leaves in a quaint little pot. The striking green creates contrast that has your counters looking gorgeous and fresh.
Stack Cookbooks and Recipe Journals
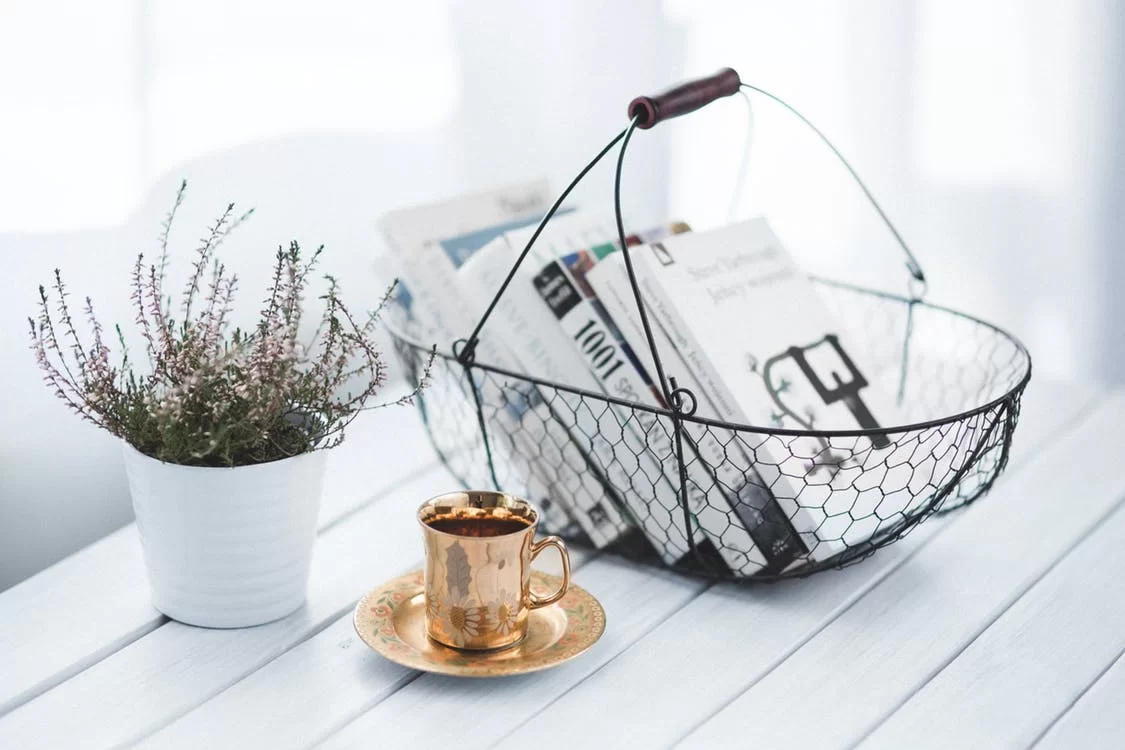
A mini book case for your counter adds a rustic charm to your counter. Showcasing your varied selection of cookbooks adds personality to the space.
If cases are cumbersome, try placing the books in a wire basket. don’t go overboard and add more than 5 of them. Always stay clutter free.
Display Artwork and Use Sexy Storage

Artwork adds elements of color and aesthetic balance to the functional space. Art that is light and unassuming with fun colors, lifts the mood of the kitchen. On that note, keeping utensils in a colored and bold storage container adds the “fun” back in functionality. Try a colored vase or brass pitcher that’s been recently polished.
Add a Chopping Board

If your kitchen isn’t merely in display, chances are you will need a chopping board. Why not invest is a great butcher’s block chopping board that gives your counter a warm look and feel?
Chopping boards are a good vantage point that shows signs of life in the kitchen.
Placed in a central position, its gives your kitchen clout without adding to clutter. It also makes a great place for staging food prep.
Perhaps you’re concerned about accumulative bacteria content in butchers block. Try stone chopping blocks that contrast yet compliment the color of your counter.
Use Enclosures and Stations

Keep food items in wooden boxes, cake tier trays pans or baskets. This prevents messes and spills from staining the counter, while creating the illusion of neatness.
Try making a coffee station that has all the essentials for coffee serving in one display box. High tea 3-tier display trays make excellent spice racks whilst conserving counter surface area.
With these useful tips, you can add charm and personality to your countertop.
Also if you’re looking to change your countertop feel free to get a quotation from Stone Amperor- House of Countertops where they house different materials and brands.
Please contact +65 8778 5195 or email sales@stoneamperor.com.sg for more information.
Alternately you may also visit www.stoneamperor.com.sg for more information.
Which natural stone is actually the best option for the kitchen countertop? Check out this to know 8 Pros and Cons of materials used in making the countertop.
How To Pick The Right Kitchen Theme
Whether your kitchen requires an immediate renovation, an improvement on certain facilities or you are hungry for a cooler design (as you have more budget to spend now than when you first moved in), you need innovative and up-to-date ideas to start planning.
Your kitchen should reflect your lifestyle. It can be colour themed, luxury, farmhouse, rustic or anything you can think of.
Start the plan with beauty and functionality of your new kitchen transformation as well as kitchen design ideas, top layouts and lighting trends.
It must optimize the storage and arrangement of each fitting and fixture. Then set a reasonable budget range that is aligned with your plan before you discuss it with your interior designer.
The materials you use to makeover every part of your kitchen play an important role too. For example, natural stone makes your kitchen look classy and solid surface reflects a contemporary vibe.
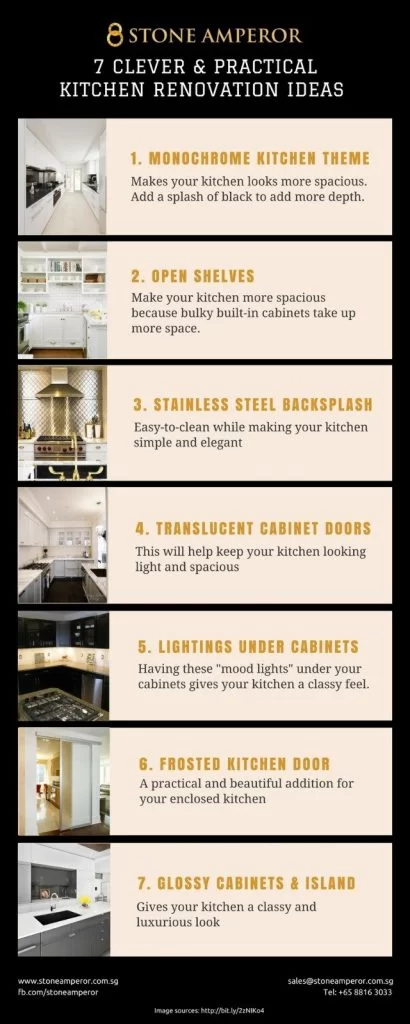
Get inspired to remodel your own kitchen with these 7 brilliant kitchen renovation ideas.
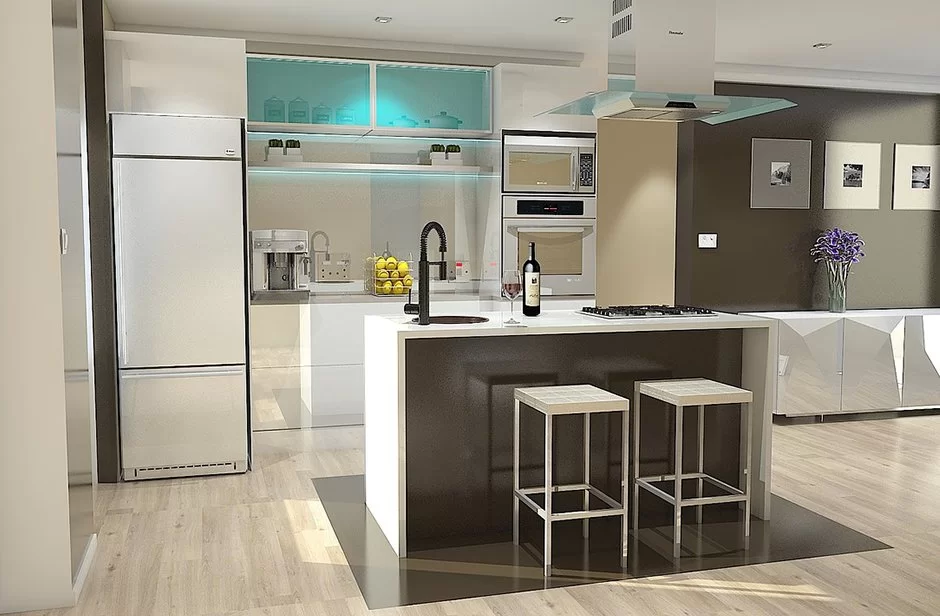
Monochrome Kitchen Theme
Monochrome kitchen theme is where you can use black and white, grayscale, other combinations containing only tones of a single colour, such as blue and white or red and black.
For areas exposed to heavy cooking spills or dirt, use dark colours – and light colours for the rest of the areas.
The stark colour contrast shows the visual sense of multi-layering that adds spice to your design. You can also add a splash of black to add more depth.
Liven up your monochrome kitchen with bright-coloured accessories such as cooking utensils, plant pots and tablewares.
Suitable kitchen surface materials for monochrome kitchen theme are: Quartz and Marble.
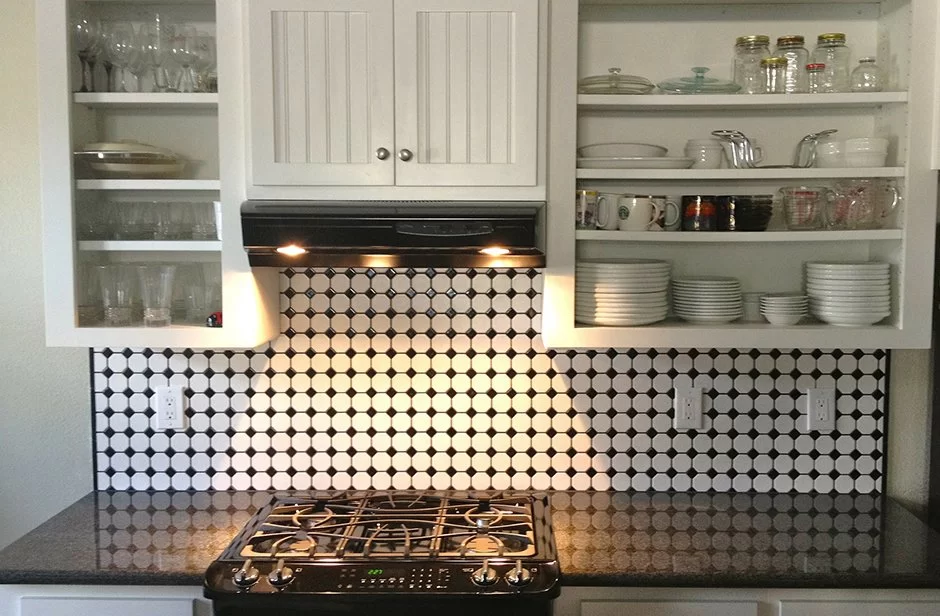
Open Shelves
Open shelves storage is a stylish and lovely way to display your collection of cups or a series of your favourite cookbooks. Do not underestimate the functionality of an open shelf.
It is not only easier to organize, but also gives you more storage options… making the space look brighter and your kitchen chores more enjoyable (because you can find your stuff more easily).
The conventional bulky built-in cabinets take up unnecessary room in the kitchen.
Suitable materials for open shelves are: Marble and solid surfaces.
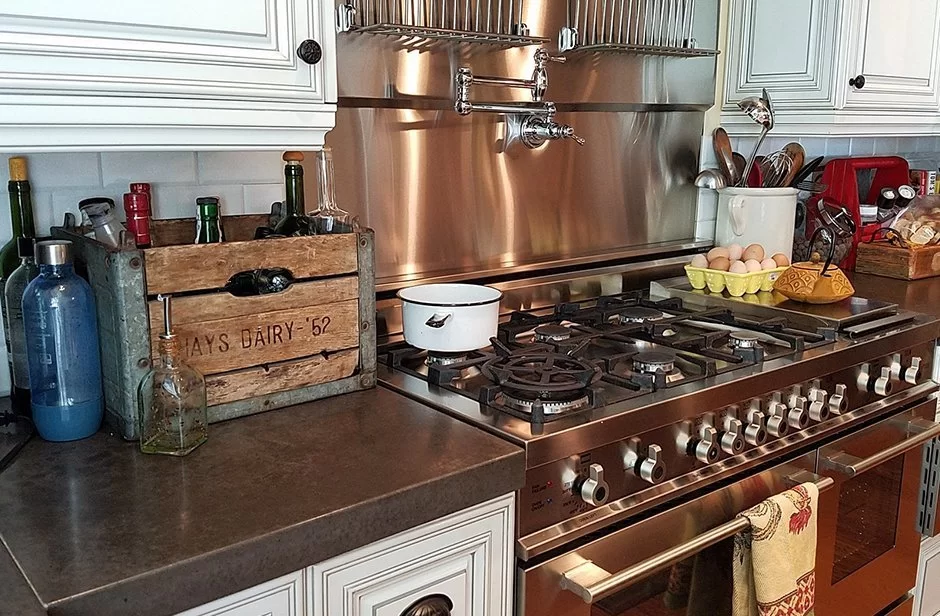
Stainless Steel Backsplash
Stainless steel is an ideal material for kitchens as they are heavy-duty and match well with most of the kitchen colours and designs.
The biggest appeal to the decision maker (house owner, developer, etc.) is that stainless steel backsplashes are easy to clean after cooking and it is non-absorbent.
There are many advantages and practicality of this material that most people have yet to discover. It is the most hygienic solution for your kitchen because bacteria and other germs cannot stay on its non-porous surface after you sanitize it.
Another leading benefit for stainless steel is that it is a flexible material – you can install it in practically any section of your kitchen. You can use small spotlights to shine on the stainless steel backsplash to infuse a dynamic and elegant vibe.
Stainless steels are relatively inexpensive as compared to other stones (subject to your requirements), making it an attractive option for backsplashes.
Its surface reflects light, acting as a mirror to give an illusion of a larger kitchen. Besides its aesthetics and low maintenance features, this backsplash is also almost indestructible.
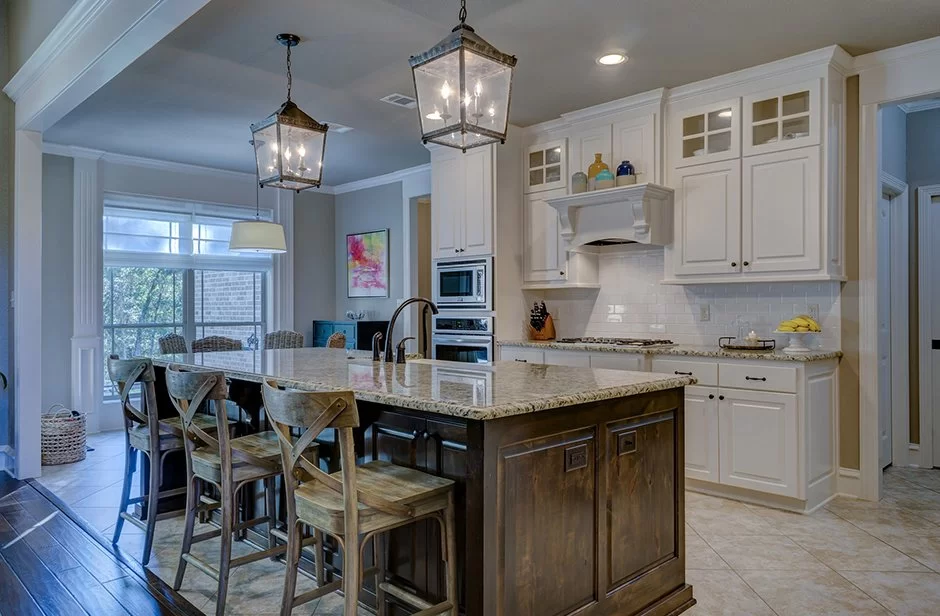
Translucent Cabinet Doors
Semi-transparent glass is the material blasted with sand or grit with a sleek look. It gives an extra sparkle to kitchens of any style, from ultra-modern to country chic. Usually designers will opt for partial translucent door to express the style of various surfaces.
Keep in mind that translucent glass doesn’t mean opaque. It allows you to place kitchenwares on display while keeping everything safe inside, protected from dust and other dirt.
Your family members and guests will still be able to see the cabinet content without opening the doors.
The best thing about this material is that it can be etched with personalized designs and patterns.
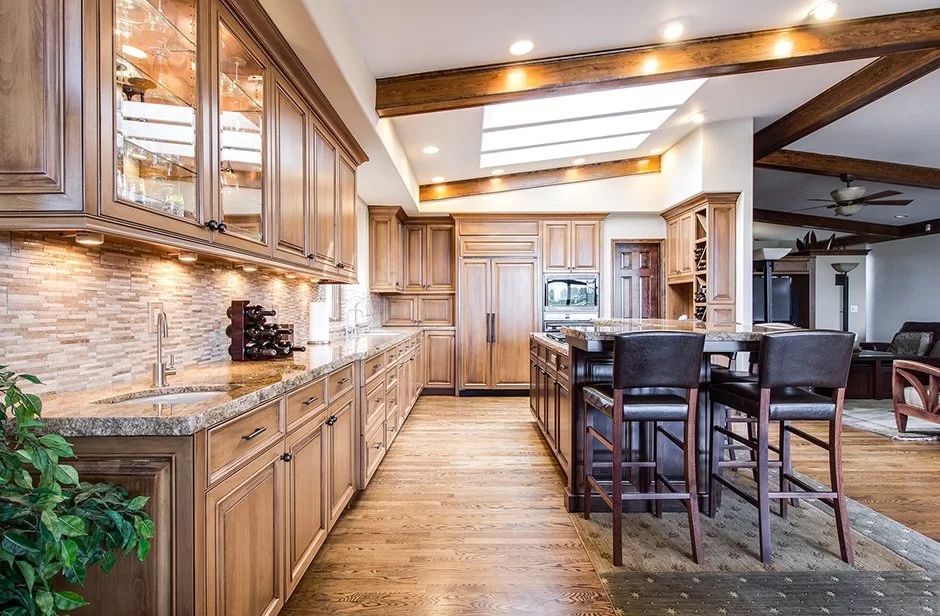
Lightings under the Cabinets
Fluorescents trips, puck lights, LED strips and LED tape are the few popular options for the “mood lights” under your cabinets. The type of lamp controls the overall style and performance of your kitchen, including the amount of light, its colour, the life of the lamp, and energy use.
These lightings can beautify and brighten up the things you put on your countertop. On top of that, it realistically helps you to focus on cooking better as all ingredients can be arranged neatly and clearly seen.
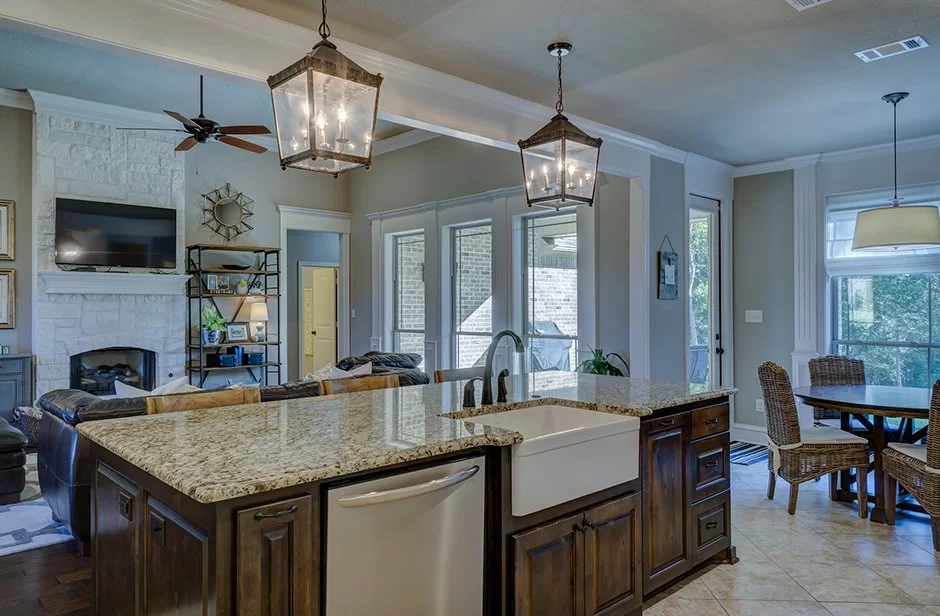
Frosted Kitchen Doors
Frosted kitchen doors give a more contemporary touch to the kitchen. This kitchen door also provides privacy and freedom for the chef to move around while he is busy preparing a meal.
It also helps to reduce the cooking smell from spreading to the living room and bedrooms. Frosted doors look best when paired dark-coloured and silver frames.
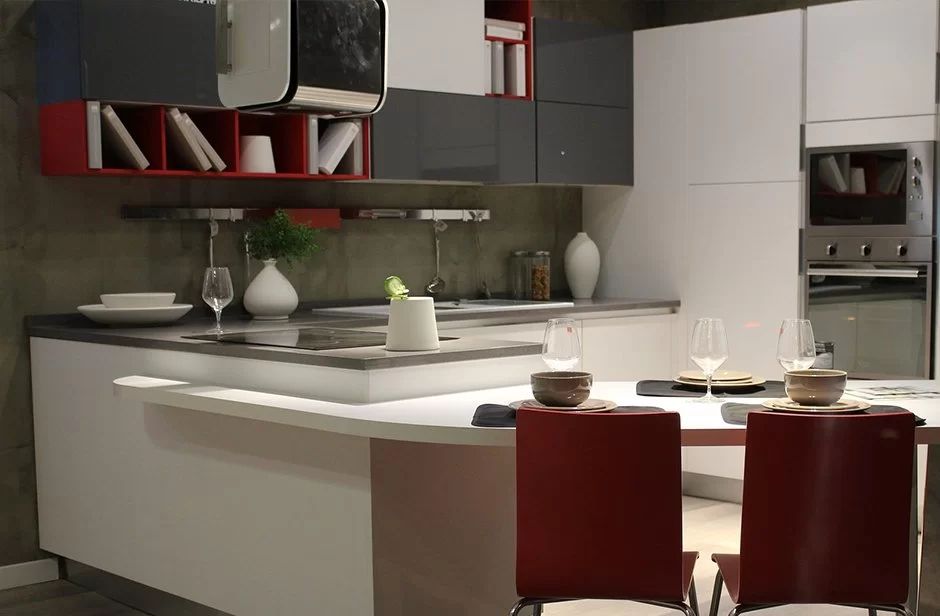
Glossy Cabinets and Islands
Gleaming countertops and cabinets will enhance the ambience and give a classy and luxurious look to your kitchen. For the appearance, a glossy cabinets and islands are natural attention grabbers.
They give the high-end impression with beautiful acrylic finishes that can add visual space and an inviting appeal to your kitchen.
However, your glossy lower cabinets has higher risk of being exposed to dirt and scratch.
Materials to achieve the shining look are: Marble, Quartz and Kryston.
If you need more information on getting the right kitchen interior designs and implementing new kitchen renovation ideas, feel free to contact us!
[Which natural stone is actually the best option for the kitchen countertop? Check out this to know 8 Pros and Cons of materials used in making the countertop.]

How To Clean Your Kitchen Counter In Singapore
Cleaning the kitchen counter is something we do just about every day. Yet there are some special ninja/wizard techniques that I can teach you to make the task of cleaning your kitchen counter faster and as close to perfection as you’re probably ever going to get it.
I’ve spent eight years figuring out the best way to clean kitchen counters, and today you’re going to learn my secrets. So let’s go!
First, we need to figure out what material your counter is. It can be quartz like mine. It could be granite, marble, which are stone.
It could be laminate, Corian, Formica, tile, and grout, or cement, or even stainless steel.
I think that covers probably most of the counters you’re going to see out there in the world.
I’m not going to get into all the specifics and care instructions for each material.
But what you can do is pay a quick visit to the manufacturer’s or installer’s website or play it like the ’90s and just pick up the phone and call them and find out exactly what they recommend for care. Some general basics I can give you are these.
Counters don’t like heat, abrasive materials, and vinegar will ruin natural and man-made stone countertops. And bleach, don’t even think about it.
It will probably stain almost any counter surface, and if you want to disinfect your counters, I’ve got a way for you to do it.
Let’s just cover some general care tips for your counters, regardless of what kind you have. Always use a trivet or a rack when anything hot comes out of the stove or the oven because heat can permanently damage a surface.
Wipe up all your spills ASAP. If not, they’re going to set and become really difficult to remove.
Some non-porous materials, like Corian, are impervious to stains. But still, why risk it? Use the most basic cleaner for daily care and something with a disinfectant for post-meal or contaminant clean-up.
I’ve got recipes and videos on those topics, which I will link down below for you. Sealants are also available for countertop surfaces. A sealant is designed to prevent stains and damage to the original surface.
But since we use our kitchen counters all the time and clean them, the sealant comes off after a while.
You can reseal your counters annually and purchase the appropriate sealant at a big-box store. I know this sounds complicated, but trust me, it is much easier than it sounds, my friends.
I myself have been there. The panic of a terrible stain setting in on your beautiful counters and the fear that that stain is going to be an everlasting reminder of your laziness or bad cooking skills. But not to worry, because I have some answers for you.
Firstly, you must know that certain finishes will scratch or stain, and you can’t use anything abrasive or acidic on them. So we’ve got get creative. That’s why it’s important to know your finish and its specific care instructions.
Any method you use to remove a stain on your counter must be tested in a small, hidden corner that your landlord or future home purchasers are never going to find. Once you’ve seen no damage, then proceed.
Now for scratchable surfaces, like stone, I have found great success and I’ve experimented like crazy in mixing up a small batch of one scoop of OxiClean to a cup of hot water, placing a piece of plastic wrap over the stain with some of that product applied, the plastic helps keep it wet, and then leave it for about 10, 20, 30 minutes until the stain lifts off. And then I wipe everything away.
Literally, every terrible stain I’ve gotten on my new counter has come right off with that solution.
Now, if you don’t have OxiClean, you can try using acetone or hydrogen peroxide as stain removers. Again, remember to test them first and don’t mix those two items.
For non-scratching surfaces, you can try a paste of baking soda and water. Apply with your finger, leave for a few minutes, and then wipe in a circular motion to buff out the stain.
You can also try a Magic Eraser, but again, be careful and test in a hidden area first.
It’s a good habit to keep a cloth and a spray bottle filled with your countertop cleaner of choice around and to create a habit of wiping up after you’ve used the kitchen.
For example, if I’m making a snack, once I’m done, I’ll just wipe the counter up, rinse the cloth and air-dry it out.
Now for anything with potential contaminants, say when I’m preparing the cat’s raw food meals, as in raw meat.
I clean up by using my disinfectant, leaving the product for the appropriate dwell time, about five minutes, and then wiping it up with a paper towel and of course tossing the paper towel.
Now if you don’t know what dwell time is, I will put a video down below for you to check out. If you’re looking to give your kitchen a thorough cleaning, this is the truest, bluest, most proper way to clean your kitchen counter.
Working clockwise, remove everything from the surface. Work in sections to make this easier. Place items in the section of the counter to your right or on the kitchen table or even on the floor.
Then spray your counter with your cleaner of choice. Let the product sit for the appropriate dwell time. Then wipe with a microfiber cloth using an S pattern. Flip the cloth over and buff it dry to remove streaks.
Then get down to eye level and check for stains, spot, or crumbs. Touch the counter up with anything that you’ve missed.
Finally, replace each item, wiping it clean the floor or the sink as you replace it. Repeat this as you work your way around the counter.
And if you want to be mother-in-law clean, line your items up parallel and perpendicular to the edge of the counter to ensure clean lines. I’d say we’ve learned a lot today. Haven’t we?
Kitchen counters are complex little beings who need lots of love and special attention. But when they’re cared for properly, they’ll keep you healthy and make your kitchen truly shine.
Now, if you don’t know what dwell time is or how to make your own countertop cleaners, or how to properly clean your kitchen sink so that it’s nice and sparkly, don’t worry. I’ve got you covered.
I’ve put all those videos in the description box down below for you. So Clean My Space nation, tell me: What’s your kitchen counter cleaning routine? That’s quite a mouthful — kitchen counter cleaning routine.
Anyway, let me know in the comments down below, because I’m very curious about how you do it. Also remember, I check Instagram about 32,479 times a day. So please feel free to tag me in your cleaning, cat, or food or any other photos.
I’m @MelissaMaker. He’s @TheChadReynolds, and we are @CleanMySpace. There’s a button down there that lets me know you care. So click it if you liked this video, and click this button right here to subscribe and begin your journey to a cleaner life.
Thanks so much for watching, and we’ll see you next time. As some of you guys know, Chad and I were on vacation last week. We launched three videos and probably commented on like two of your posts.
But trust me, we read all the comments, and it’s just been very busy getting back from vacation and trying to catch up on everything. So if I don’t get back to your comments on those videos, I do apologize. But trust me, I have been reading them, and I love your questions.
So thank you so, so much for asking and, of course, for your wonderful comments. See you soon..
Curated from Youtube
Choosing a countertop for your kitchen can be a tough decision as we all want the best that time and money can buy. However, when asked about kitchen top edge profiles, we’re surprised that most customers simply do not know what they want.
How To Choose Your Kitchen Top Edge Profiles
Aside from aesthetics, there are a few key differences that differentiate edge profiles from one another. Let’s have a look at a few edge profiles and their fundamental differences:
Types of Kitchen Top Edge Profiles:
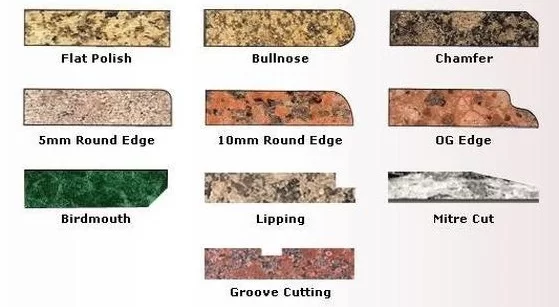
1. Standard Flat Polish –
Favoured for the thick-look that it gives, flat polishing is a popular industry standard for a reason. The flat edge helps hold liquids from spilling over and does not contain any nooks and crannies that might be difficult to clean. However, its sharp angles can present a safety hazard.
The birdmouth, chamfer and miter cut share this issue, with the latter having the additional hazard of objects sliding off its sloped edge. Flat Polish edges are also more affordable on average in terms of pricing.
2. Bullnose –
Favoured for its pragmatism and probably the most popular edge profile around, the bullnose features a completely rounded edge all around the top and bottom of the edge.
This makes it ideal if safety is a concern while the smaller angle in which these edges helps it from breaking or chipping when impacted with something hard. Bullnose edges are also inexpensive to put on. However, many find the bullnose edge boring (and we agree!).
3. Groove Cutting –
Groove cuts (also called drainboards or runnels) are cut close to the edges of countertops with the purpose of draining spilled liquids before they go over the edge. This makes groove cutting especially useful where water is found, namely sinks or anywhere where water is likely to be handled.
4. Lipping/OG Edge –
Favoured for their incredibly sophisticated looks, Lipping and Ogee (OG) edges have roughly the same pros and cons as the flat polish and bullnose profiles. However, the extra surface also means that cleaning it can be slightly more of a chore, but we think it’s a small price to pay for how good it looks.
And there we have it! Hopefully, if you’re ever given a choice of kitchen top edge profiles to choose from you’d be able to make a more informed decision. Happy countertop hunting!
Looking for a Kitchen Top in Singapore? Contact Stone Amperor for natural stone countertop options, solid surfaces and Quartz! Feel free to visit SevenKonzept to get tips and services on interior designs!
How To Pick The Right Countertop Material
The job of countertops is not easy, having to handle daily abuse and look beautiful at the same time… now that’s a tough gig.
There are a lot of options out there to choose from but they’re not all equal not even close actually especially if you’re aiming for the highest quality.
if you already have a type in mind, you can get your price quoted out here [quote me]
be sure to check your price [to prevent scam]
So let’s take a look at the differences between some of the major options out there…
Stainless Steel Countertop
Stainless steel countertops are making an appearance in industrial looking kitchens now they’re durable and heat and stain resistant but watermarks and crumbs are pretty obvious they also scratch and dent fairly easily so unless you’re going for that really rugged look you want to be careful.
My general rule: Save the stainless steel for the appliances.
Concrete Countertop
Now some people are installing concrete countertops for a uniquely modern and industrial look in terms of durability they are tough and heat resistant but they’re very heavy and they’re difficult to install.
You need to make sure your cabinetry can even handle the weight. I know that in some cases you have to reinforce your cabinets to even handle those countertops.
Also since they’re so unique they might not add to the resale value of your home which in my opinion is not a good thing.
Butcher Block Countertop
Now butcher block countertops can be nice to work on they can be great for your prep zone but they’re not generally appropriate choice for the entire countertop.
Remember they do scratch and chip which some people say adds to the charm but they aren’t stained and heat-resistant and they need to be sanded sealed and oiled regularly to stay in tip-top shape. I would use them possibly as an accent.
Natural Stone Countertop
Then there are natural stone countertops. Although there are a lot of players out there we’re going to take a look at the three most common in luxury homes and that’s granite, marble, and quartz.
I’m going to compare them in four different categories – durability, maintenance, porosity, and hygienic quality.
So let’s start with granite countertops.
Now in terms of durability granite can handle normal kitchen wear and tear quite well. However, if a heavy object is dropped on it it may chip or crack.
Granite is not necessarily heat resistant and is subject to problems with rapid temperature change.
In terms of maintenance, most people don’t know this but granite needs to be sealed sometimes as frequently as once a year so there’s a little bit of upkeep here.
Granite is porous which means there are little holes that allow liquid and air to pass through if not sealed properly, it may absorb wine and juice stains.
Which brings me to hygienic qualities again: if not sealed properly or the sealant wears off granite can absorb and harbor bacteria nasty.
And then we have marble, another natural stone option that pops up in luxury kitchens it comes in a vast array of styles and colors.
Let’s see how it stacks up. Well, strong marble is not the most durable a hard hit from a pot or a pan can chip or even break a piece off.
Similar to granite, heat can be an issue with marble as well. And in terms of maintenance as well, like granite, marble has to be sealed regularly to maintain its look.
Now marble is more porous even than granite so it’s prone to chipping cracking and definitely staining. If you spill something acidic like wine it will definitely stain.
In terms of hygienic factors, if not sealed properly or the sealant wears off marbles can absorb and harbor bacteria.
Quartz Countertop
And finally, we have quartz countertops. Now quartz comes in a vast array of colors and designs it’s becoming a favorite for designers looking for a beautiful solution and in this kitchen, we don’t just have any quartz.
We have Cambria quartz. In fact, their Britannica design which is one of my favorites so let’s see how it stacks up against marble and granite.
Quartz is durable – it’s one of the hardest minerals on earth. In fact, followed only by diamond, it’s nearly scratch resistant and does not stain.
Quartz is virtually maintenance-free to clean these Cambria countertops. You’re basically just using soap and water. That’s it, no sealers or polishing ever needed.
Now this countertop which is non-porous as well… means if you spill some wine it won’t stain and because of all those factors, it doesn’t harbor bacteria. So it’s a safe choice as well.
Summary
So let’s bring them all up at the same time. All of these options are good in their own way and can look great in your kitchen but you want your countertop to look as good 10 years from now as it does the day its installed… well, the job of a countertop can be tough, but Cambria does it with style.
Curated from Youtube
The Definitive Kitchen Guide 2019 – Get Your Kitchen Right : Thanks For Reading & Hope You End Up With Useful Tips And A Solid Motivation!


